
Need to rename a floor, change how its floorplan looks or hide it from people? This article explains each setting behind the cog on the level page, and how to save your changes.
Note: Changes you save are visible to everyone straight away.
Open the settings
-
Open the level from Maps.
-
Click the Location Settings icon (the cog) at the top right.
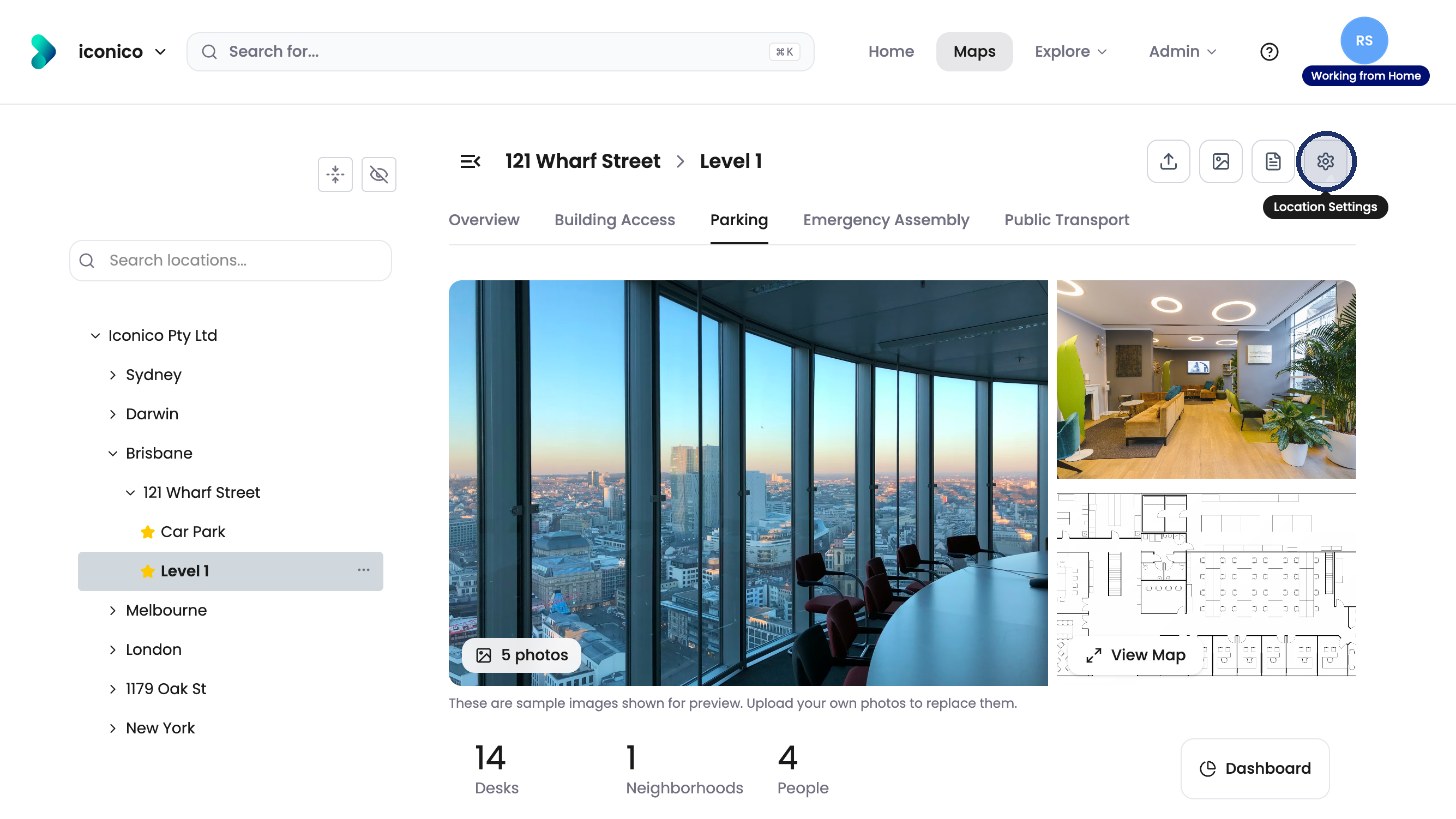
Click the cog to open Location Settings.
The Settings tab opens.
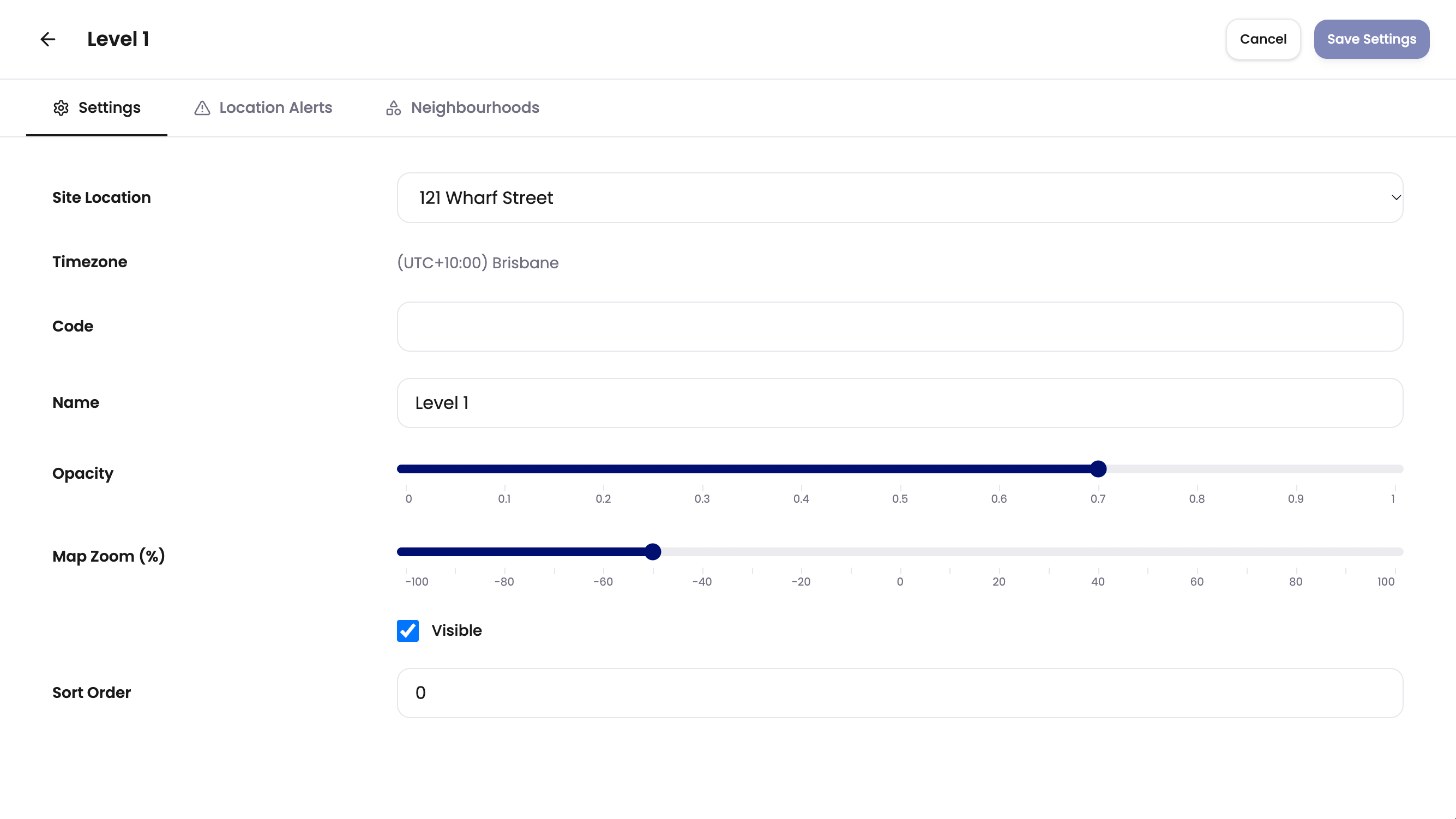
What each setting does
|
Setting |
What it does |
|---|---|
|
Site Location |
The office (building) this level belongs to. Changing it moves the level to a different office in the location tree. |
|
Timezone |
The time zone the level uses. It comes from the location above it and can’t be changed here. |
|
Code |
An optional short code for the level. |
|
Name |
The level’s name, as people see it in Maps, search and bookings. Required. |
|
Opacity |
How strongly the floorplan image shows, from 0 (invisible) to 1 (full strength). |
|
Map Zoom (%) |
How far the floorplan is zoomed in or out when it opens. |
|
Visible |
Untick to hide the level from people who aren’t administrators, for example while you set it up. |
|
Sort Order |
Where the level appears in lists of levels. Lower numbers appear first. |
Save your changes
Click Save Settings at the top right. To leave without saving, click Cancel.
The other tabs
-
Location Alerts: add notices that show on the level page and pop up on the map. See How do I post an alert on a level?
-
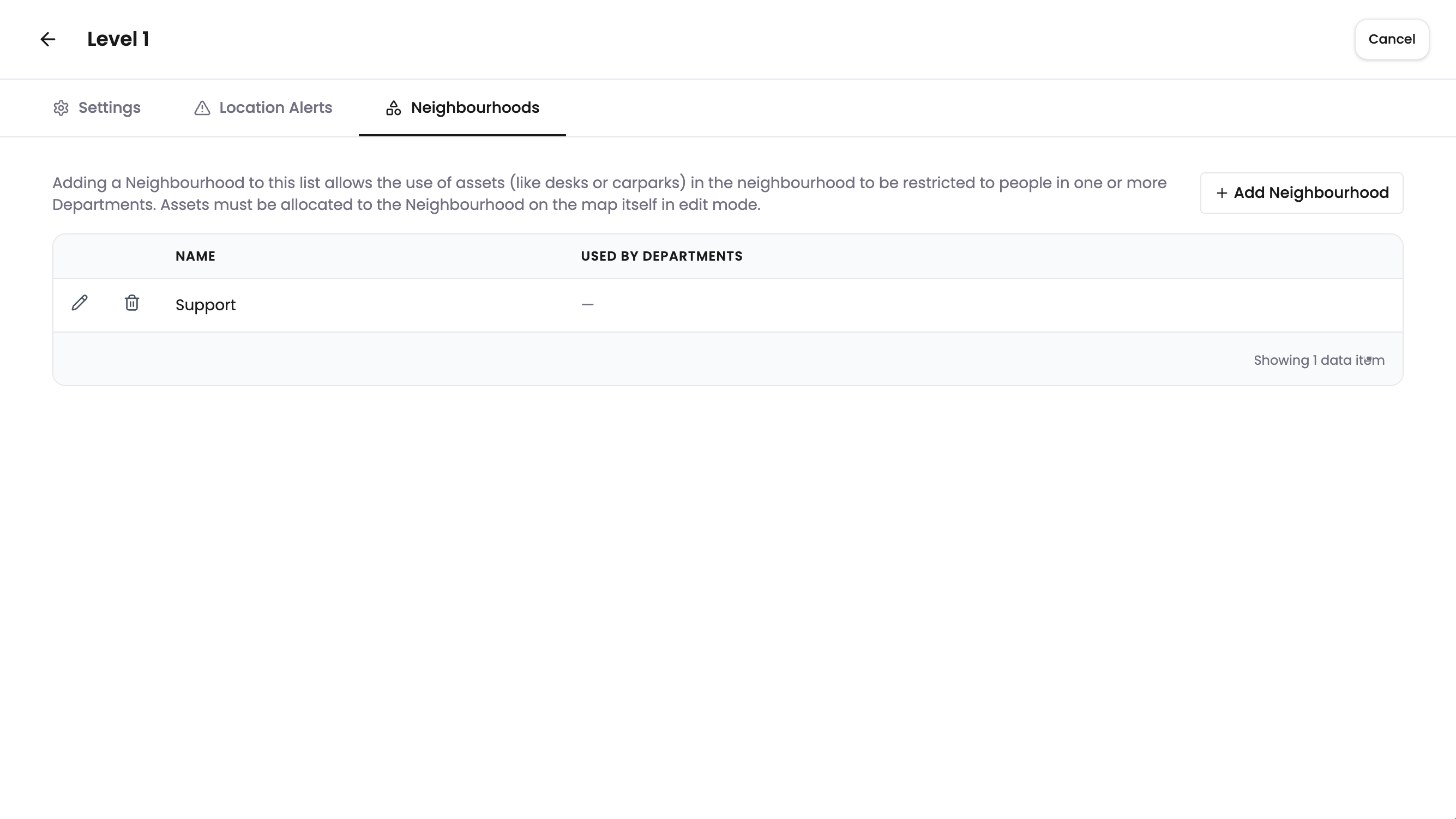
Neighbourhoods: set aside desks and other assets on this level for one or more departments. See How do I keep desks for one team only?
Tips
-
To go back to the level page, click the arrow at the top left.
-
Keep a new level hidden until its floorplan, desks and information are ready.