Want certain desks to be used only by one team or department? This article shows you how to set up a neighbourhood and switch on restrictions, so only people in the right departments can book those desks.
Note: Neighbourhoods are a PRO feature. Restrictions are set per level, so repeat steps 2 and 3 for each level you want to restrict.
Before you start
Make sure your departments are set up and people are in the right departments. A person’s department membership decides which neighbourhoods they can use. See How do I set up departments?
1. Create the neighbourhood
-
Click Admin, then Administration.
-
Under Settings, click Neighbourhood.
-
Click + Add, then fill in Name, Order and Color. The colour is used to outline the neighbourhood’s assets on the map.
-
Click the save icon (the disk).
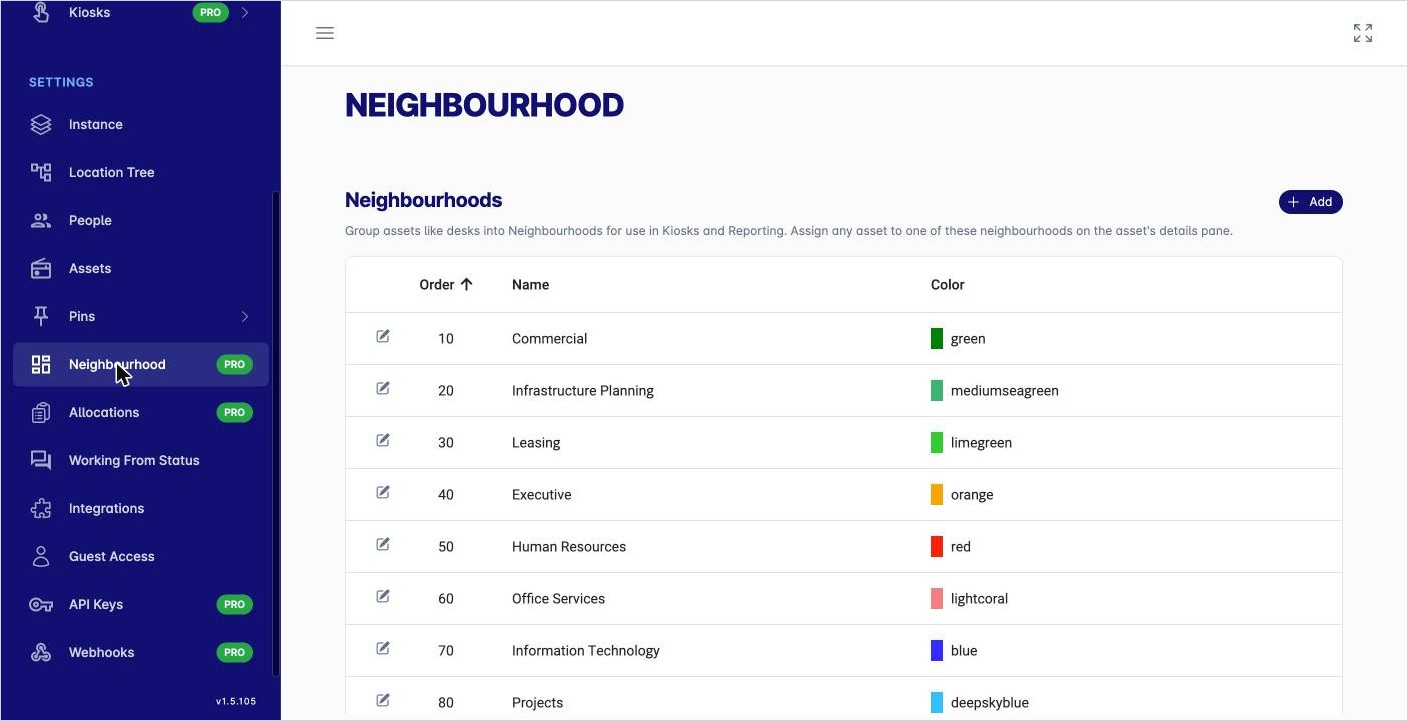
The list of neighbourhoods in Administration.
2. Put assets into the neighbourhood
An asset can belong to one neighbourhood.
-
Open the level’s floorplan and click the asset.
-
Click View Details, then Edit.
-
Choose the neighbourhood in Neighbourhood, then click Save.
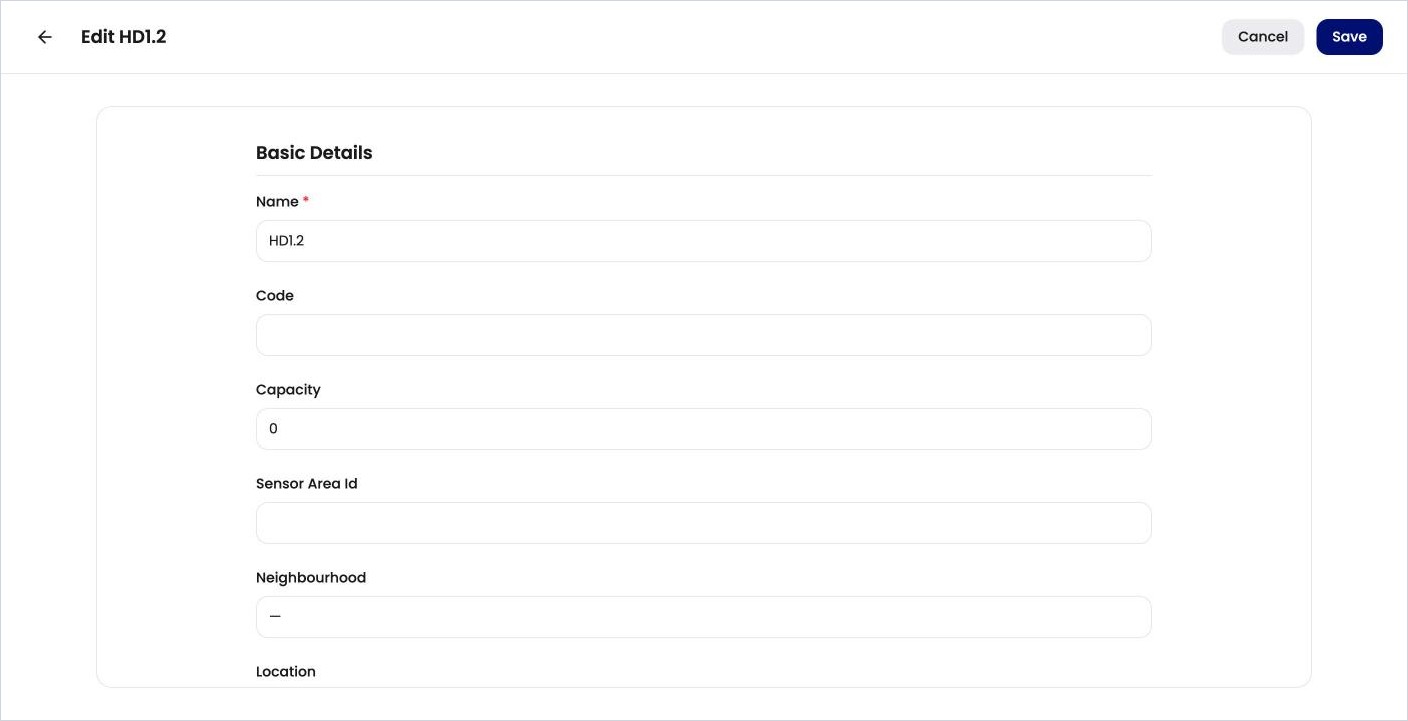
Choose the neighbourhood when you edit an asset.
You can also assign assets in map edit mode, using the Neighbourhoods tool (the house icon). See How do I add desks and pins to the map?
Assets in a neighbourhood show a coloured outline on the map.
3. Link the neighbourhood to departments on the level
-
Open the level from Maps and click the cog (Location Settings) at the top right.
-
Click the Neighbourhoods tab.
-
Click + Add Neighbourhood.
-
Choose the Neighbourhood, then tick the departments under Used By Departments. Use the search box to find a department quickly.
-
Click Add.
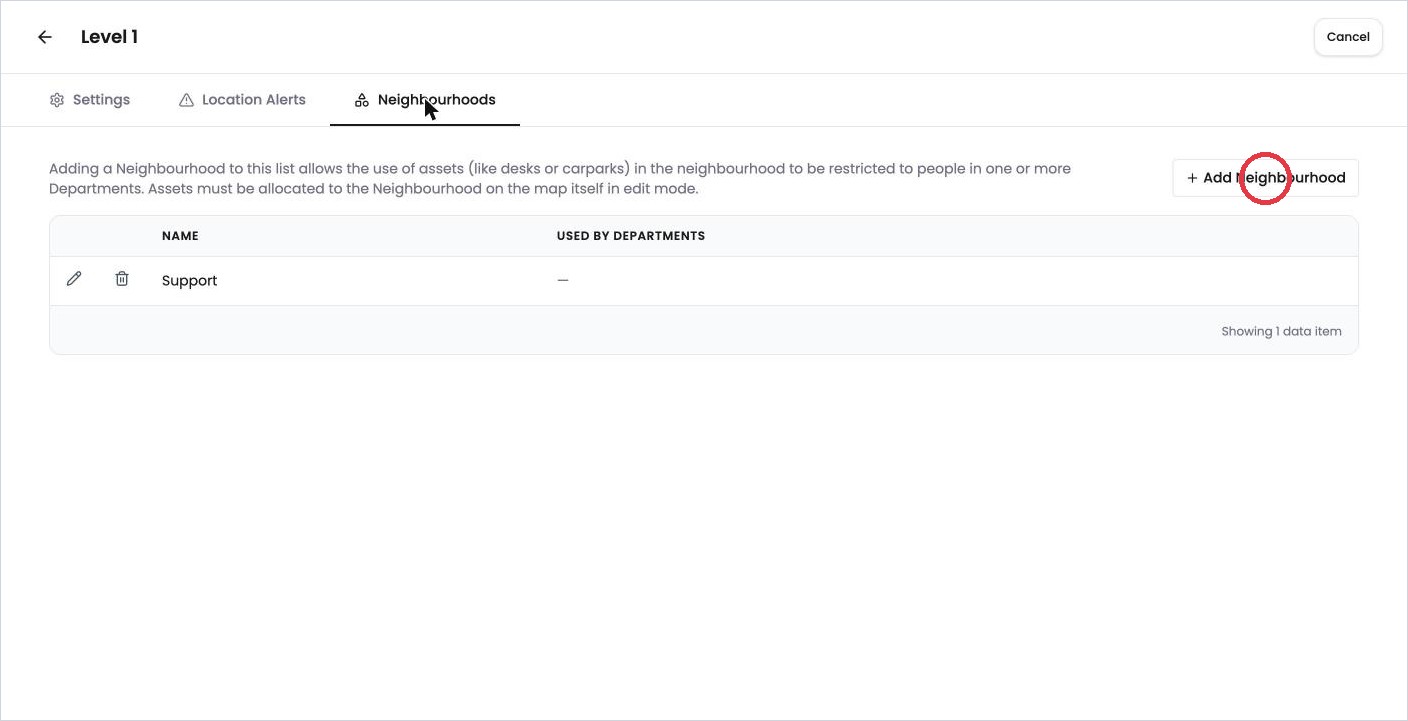
The Neighbourhoods tab on a level. 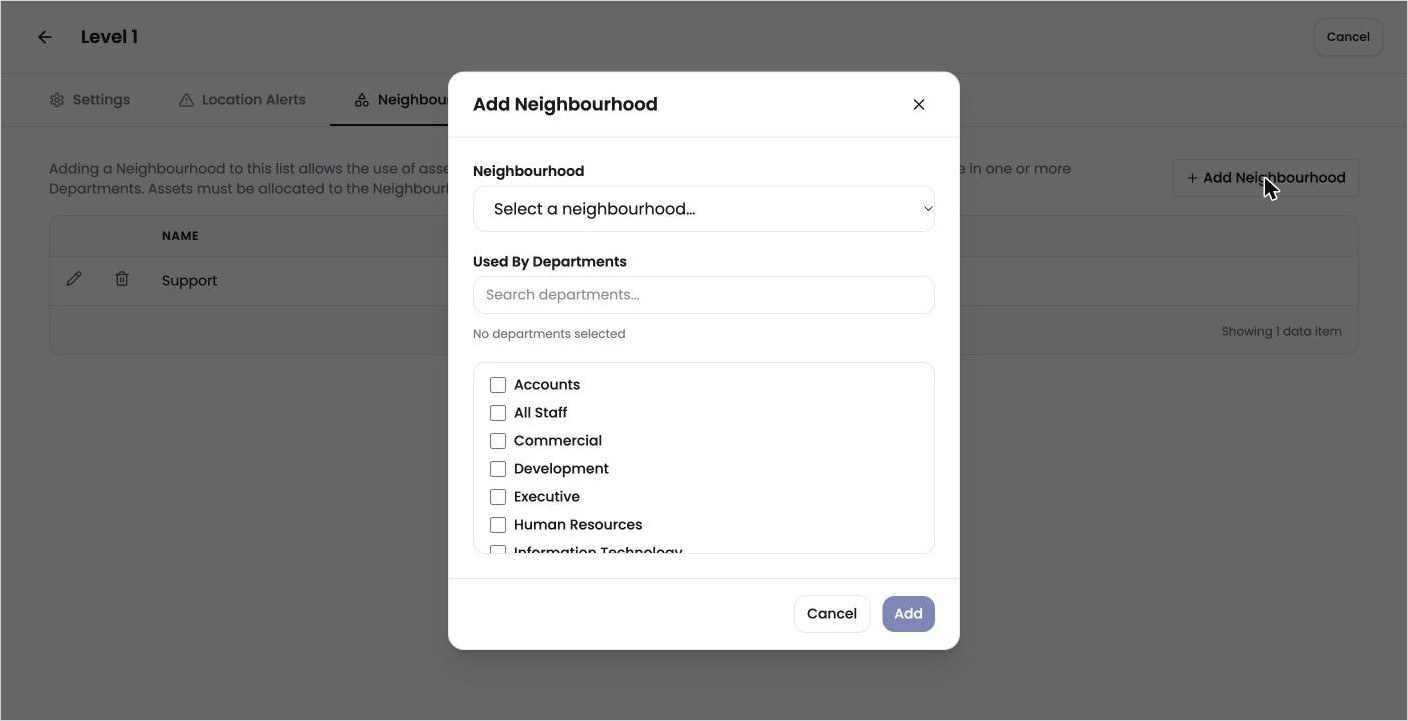
Choose the neighbourhood and the departments that can use it.
To change the departments later, click the pencil next to the neighbourhood. To remove it from the level, click the bin.
4. Switch on the restrictions
-
Go back to Admin › Administration and, under Settings, click Allocations.
-
Under Neighborhood Restrictions, tick the options you want:
-
Enable Neighborhood reservation restrictions: only people in the linked departments can reserve these assets.
-
Enable Neighborhood check-in restrictions: only people in the linked departments can check in to them.
-
Exempt Administrators from Neighborhood restrictions: administrators can still book and check in anywhere.
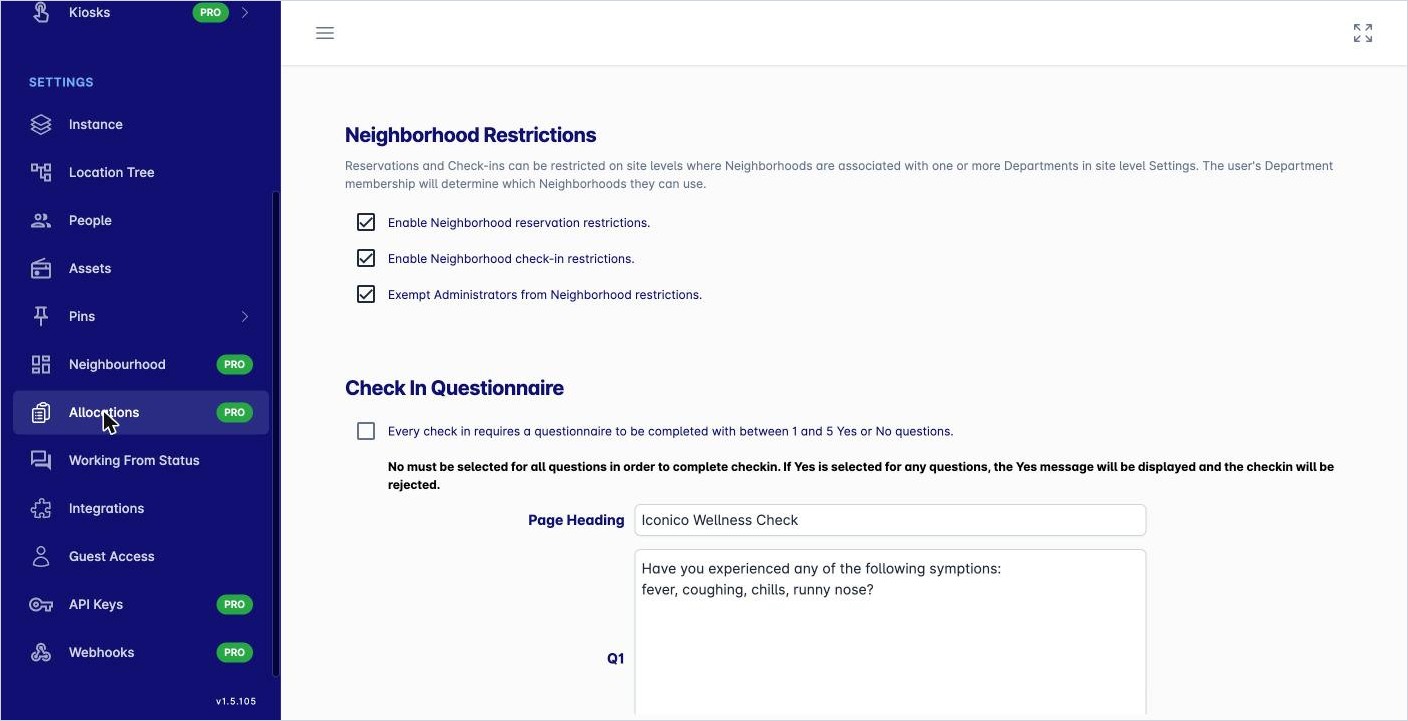
The Neighborhood Restrictions options in Allocations. -
Tips
-
Each department’s page (Explore › Department) lists the neighbourhoods linked to it.
-
The level dashboard lists each neighbourhood with its number of desks. See What do the dashboard figures mean?
-
Neighbourhoods are also used in kiosks and reporting, even without restrictions switched on.