
Want to mark fire exits, first aid kits or printers on your floorplans? This article shows you how to create pin types, group them into categories, and delete the ones you no longer need.
Open pin types
-
Click Admin, then Administration.
-
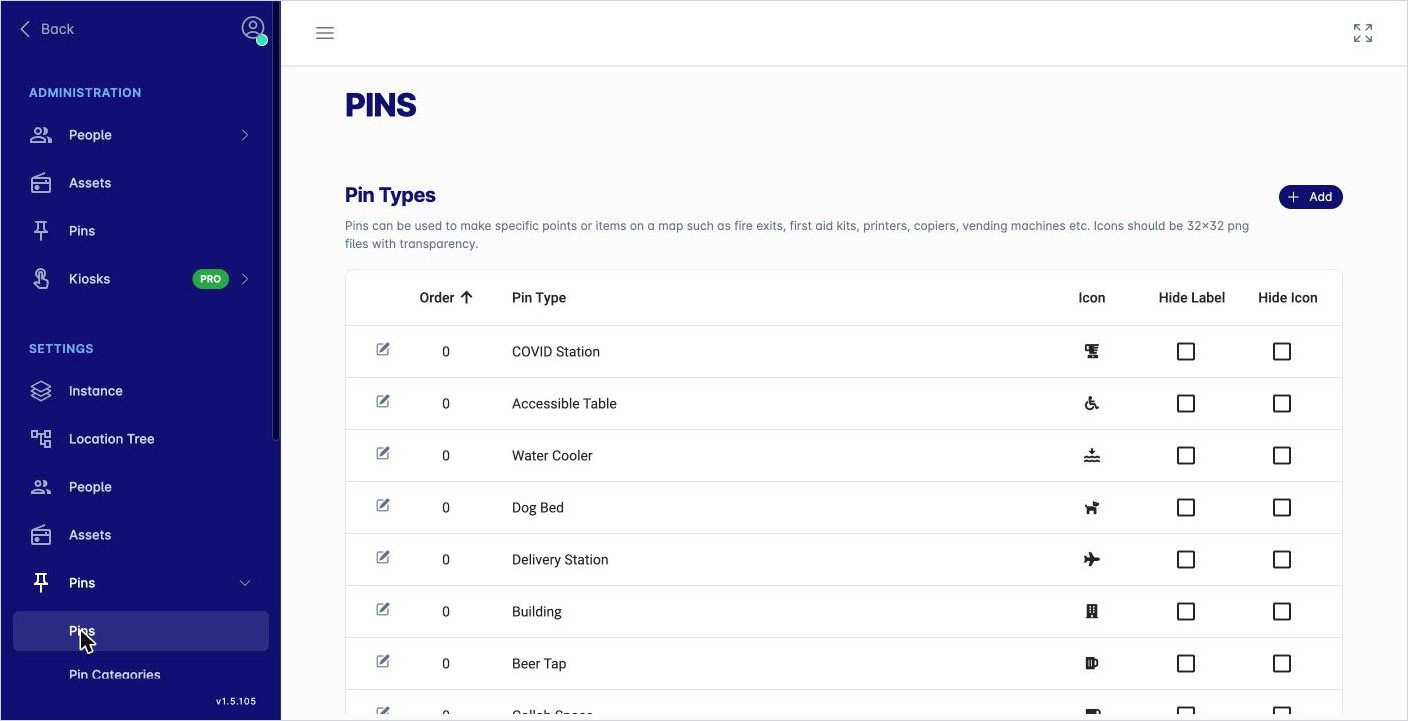
Under Settings, click Pins, then Pins.
The Pin Types list shows each type’s order, icon, and whether its label or icon is hidden on the map.
Add a pin type
-
Click + Add. The New Pin Type panel opens.
-
Fill in:
-
Pin Type: the name, for example First Aid Kit.
-
Category: the pin category it belongs to (optional, see below).
-
Order: where it appears in lists. Lower numbers come first.
-
Icon Source, Icon, Icon Color, Icon Size and Icon Rotate: how the pin looks on the map.
-
Hide Label and Hide Icon: hide these on the map.
-
-
Click the save icon (the disk) at the top of the panel.
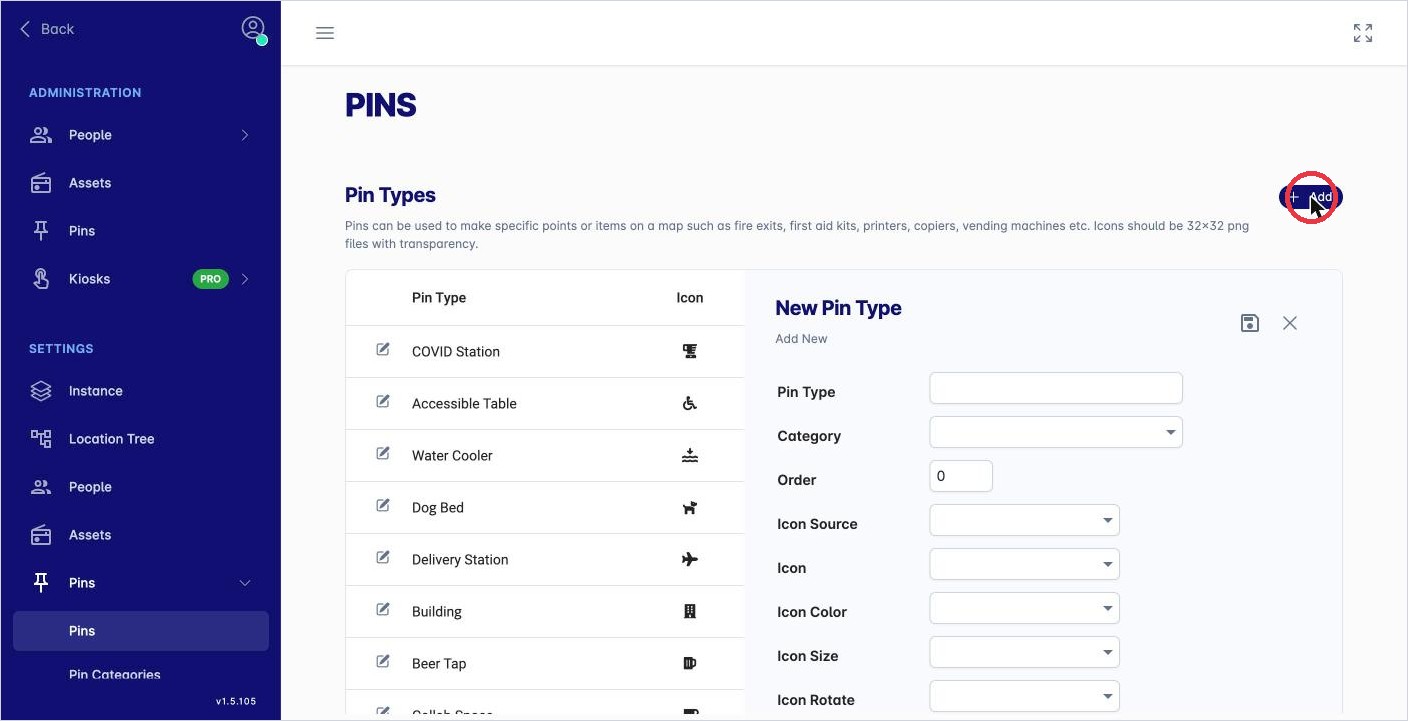
Click + Add to open the New Pin Type panel.
To change a pin type, click the pencil next to it. To close a panel without saving, click X.
Group pin types into categories
Pin categories are new in V2. They group pin types so they can be managed and assigned consistently, for example a Safety category for fire exits, extinguishers and first aid kits.
-
Under Settings, click Pins, then Pin Categories.
-
Click + Add.
-
Fill in Name, Description, Colour, Order and, if it sits inside another category, Parent.
-
Click the save icon.
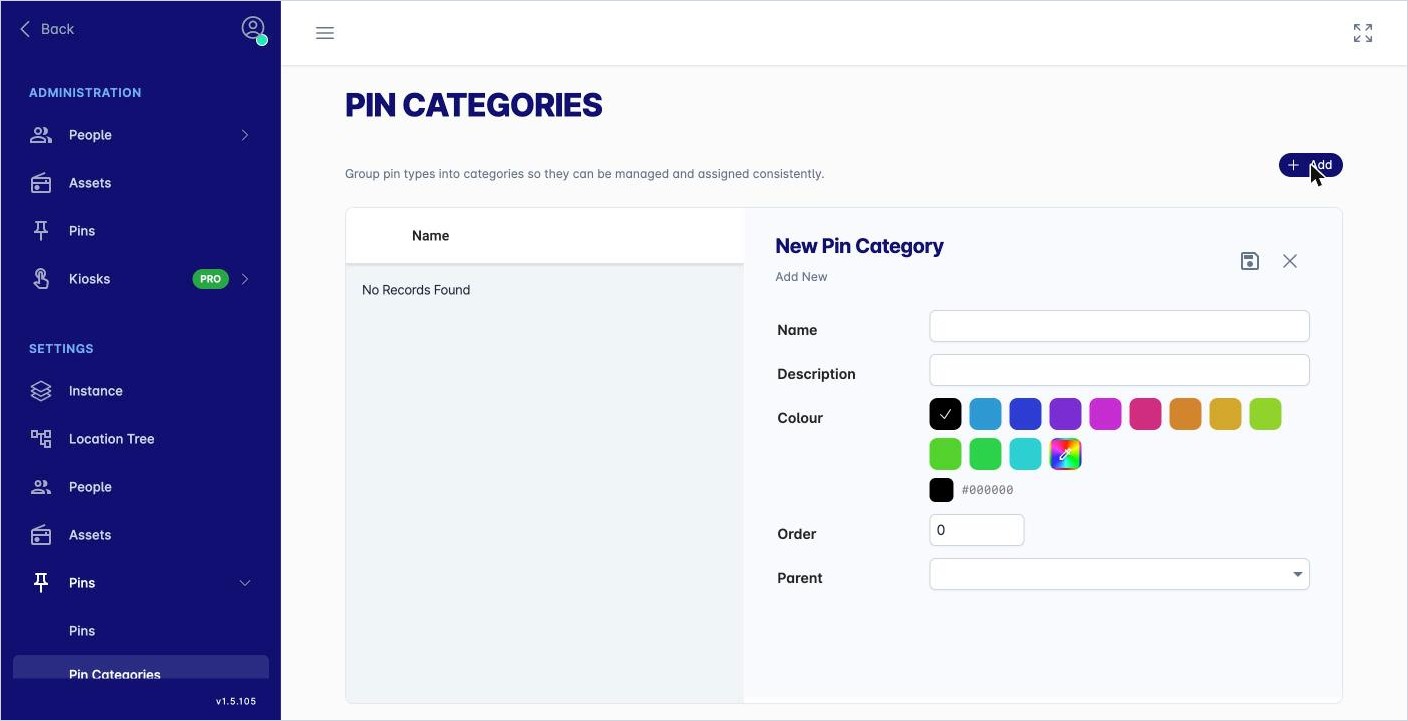
Adding a pin category.
Then open each pin type and choose its Category.
Delete a pin type
-
Click the pencil next to the pin type.
-
Click the bin icon at the top of the panel.
Tips
-
Use the same names your people use. Search finds pins by name, so “First Aid Kit” on every first aid kit makes them easy to find.
-
Keep icons simple and easy to tell apart at small sizes.