Need to add a desk, meeting room, car park or pin to a floorplan? This article shows you how to place them on the map in edit mode, rename and move them, block bookings, and remove them.
Note: There’s no Save button in edit mode. Every change is saved as soon as you make it.
Turn on edit mode
-
Open the level’s floorplan from Maps.
-
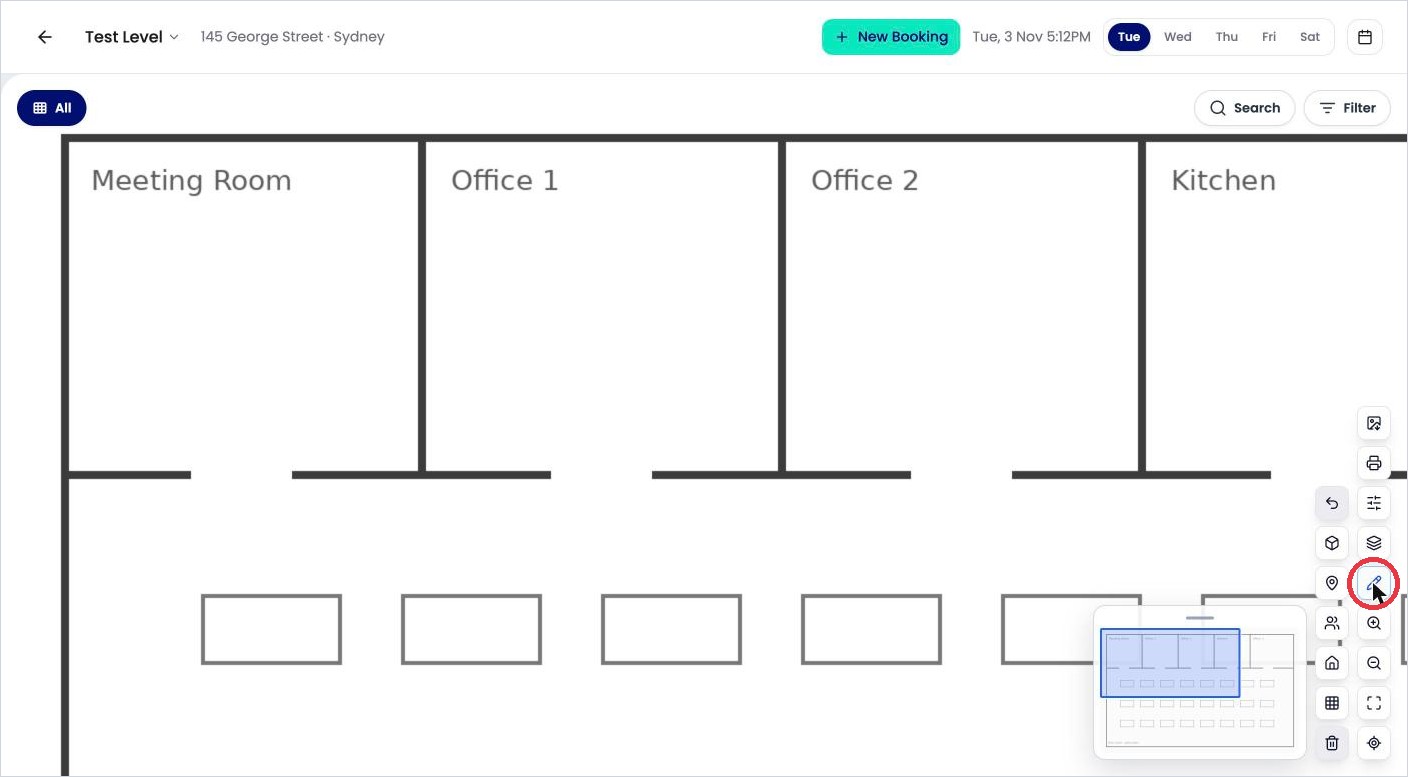
Click the pencil in the toolbar on the right.
A second column of tools appears beside the toolbar.
|
Tool |
What it does |
|---|---|
|
Undo (curved arrow) |
Undoes your last change. |
|
Asset types (cube) |
Lists your asset types, such as Hot Desk or Meeting Room, to drag onto the map. |
|
Pins (map pin) |
Lists your pin types, such as First Aid Kit or Printer, to drag onto the map. |
|
People |
Lists people you can drag onto a desk. See How do I seat someone at a desk on the map? |
|
Neighbourhoods (house) |
Puts assets into a neighbourhood. See How do I keep desks for one team only? |
|
Grid |
Shows a grid over the map, to help you line things up. |
|
Delete (bin) |
Removes the selected item from the map. |
To leave edit mode, click the pencil again.
Add a desk or other asset
-
Click Asset types (the cube).
-
Drag the asset type, for example Hot Desk, onto the map where it belongs.
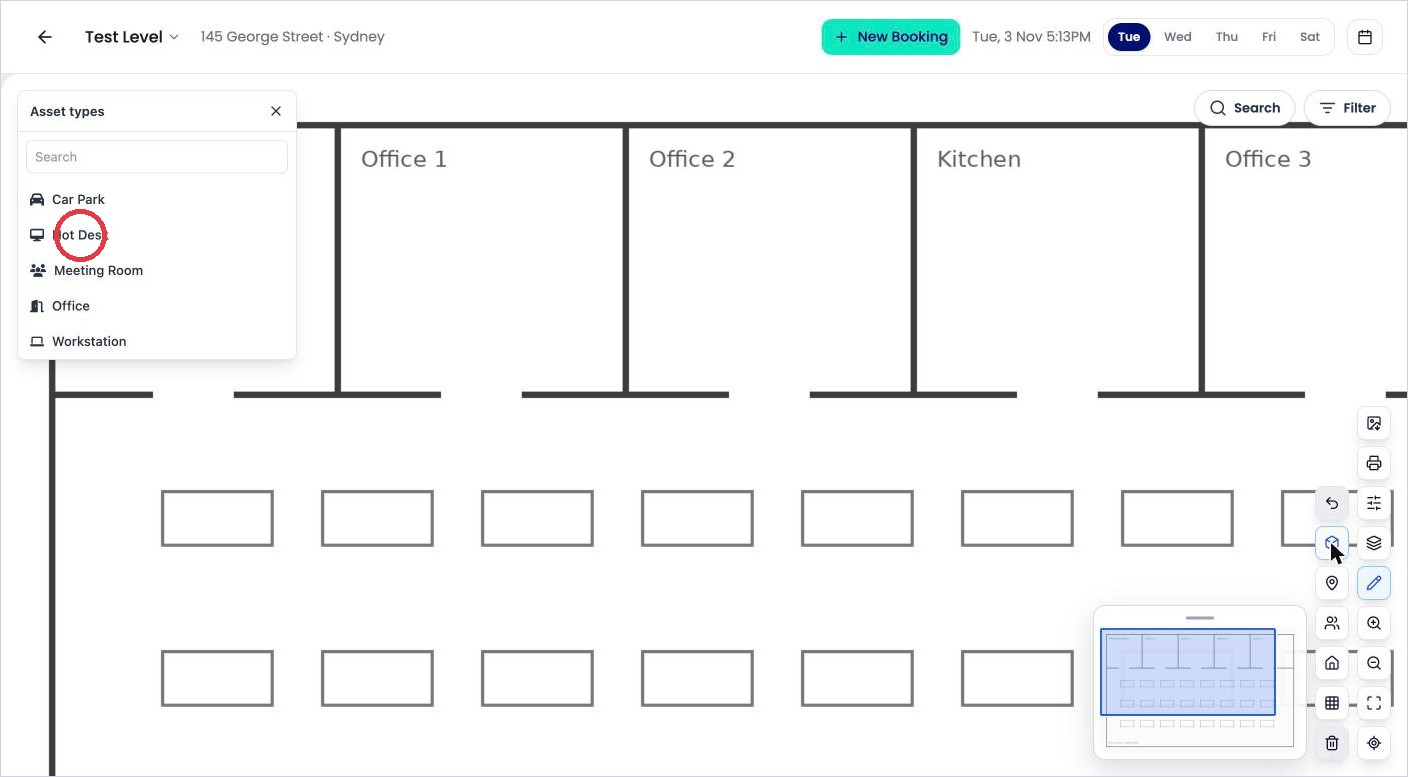
Drag an asset type from the panel onto the map.
The new asset appears with a dashed outline while you’re in edit mode. It starts with the asset type’s name, for example Hot Desk.
Rename an asset
-
Double-click the asset’s label on the map.
-
Type the new name, for example WS1.01, and press Enter.
Give every desk a unique name, so people can find it in search and you can update it from Excel. See How is OfficeMaps organised?
Move an asset or pin
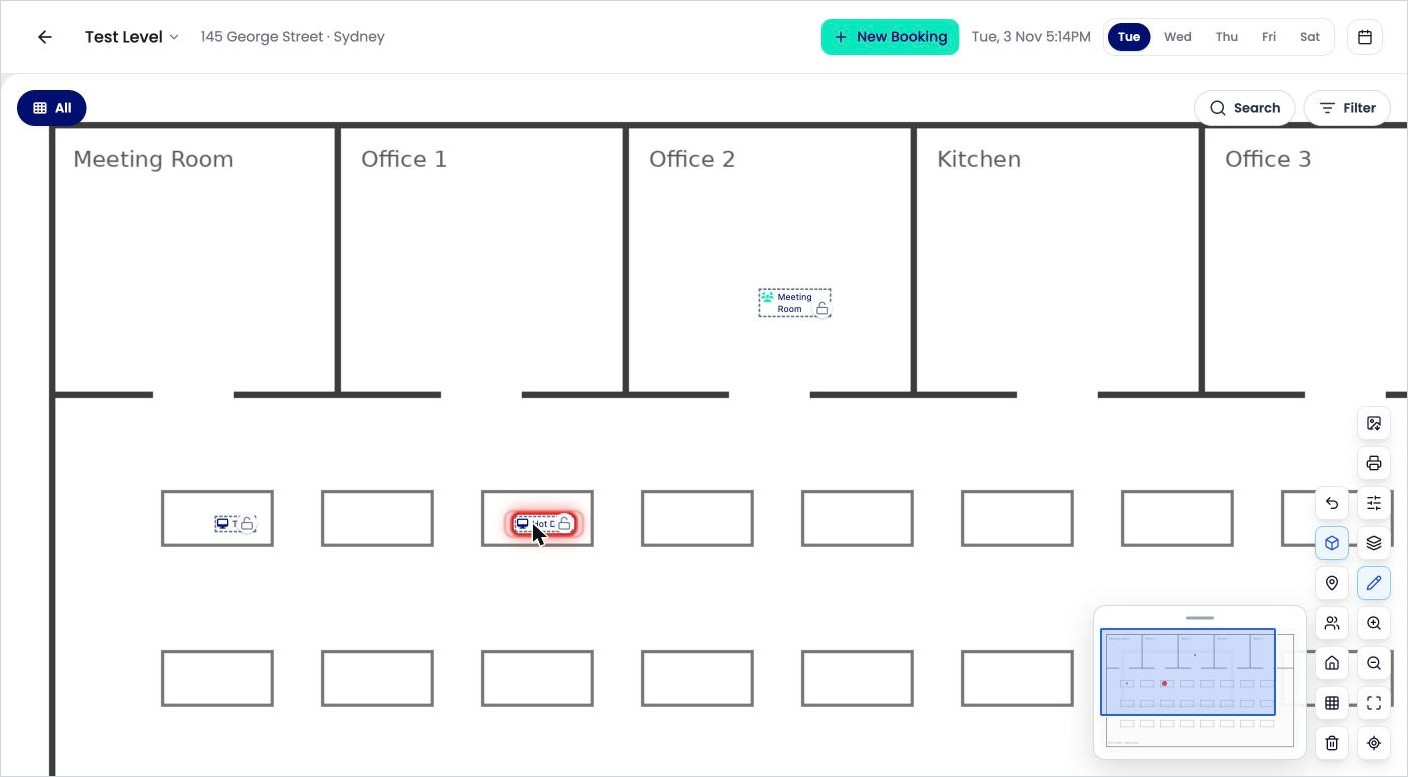
Drag it to its new place on the map.
Add a pin
-
Click Pins (the map pin).
-
Drag the pin type, for example First Aid Kit, onto the map.
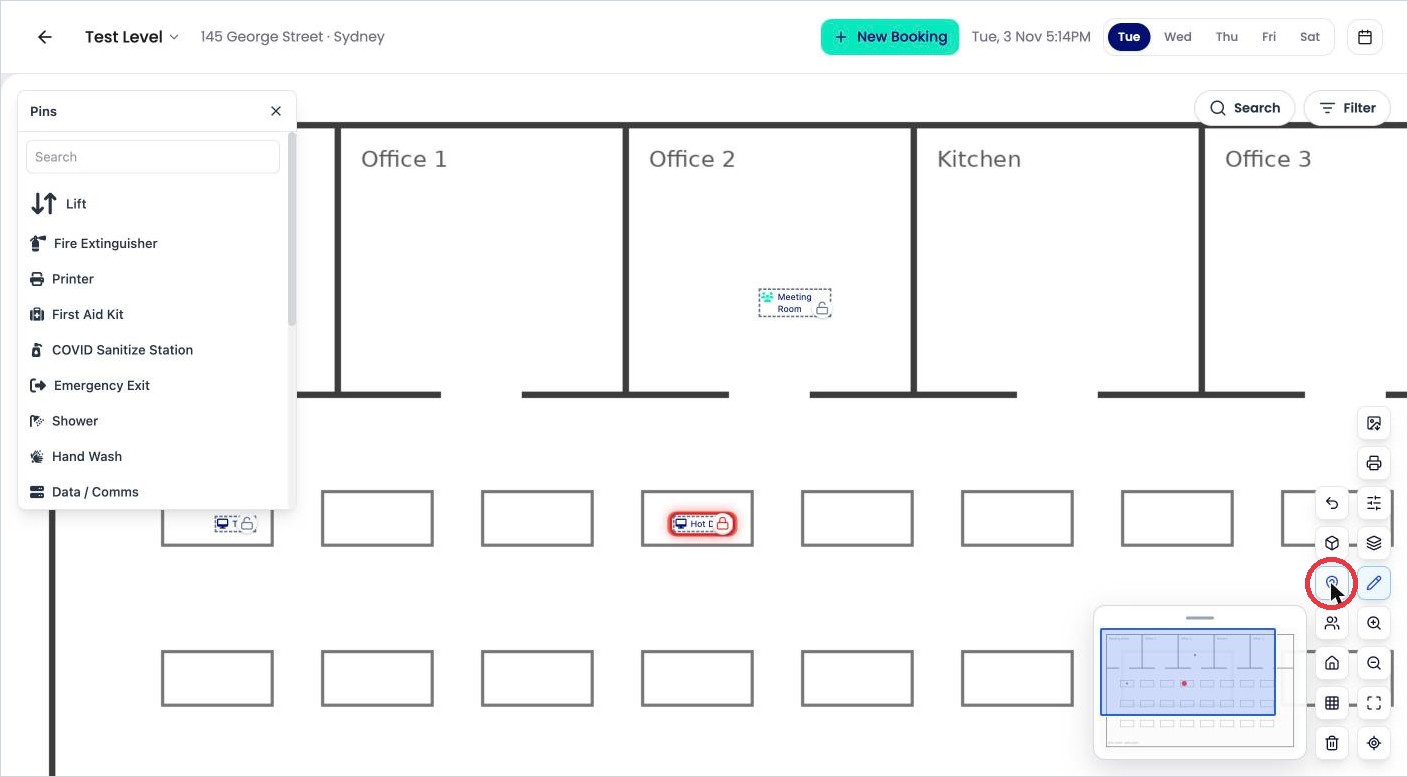
The Pins panel.
Remove an asset or pin
-
Click it on the map to select it.
-
Click Delete (the bin) in the tool column.
-
Click Remove to confirm.
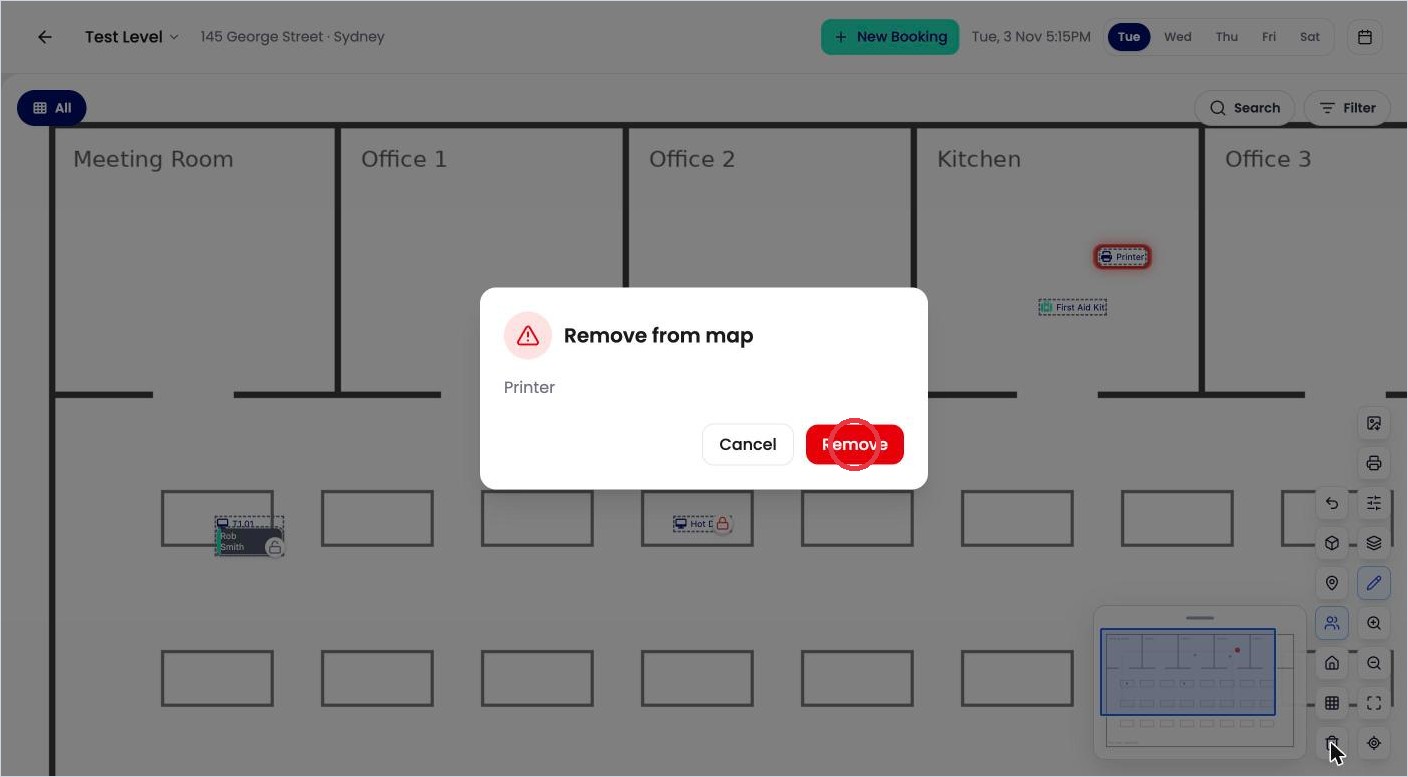
Confirm that you want to remove it from the map.
Block bookings on an asset
Each asset in edit mode has a small padlock beside its name. Click the padlock to block allocations on that asset. It turns red, and in view mode the asset shows a red warning icon. Its panel says Allocations are blocked for this asset. Click the padlock again to unblock it.
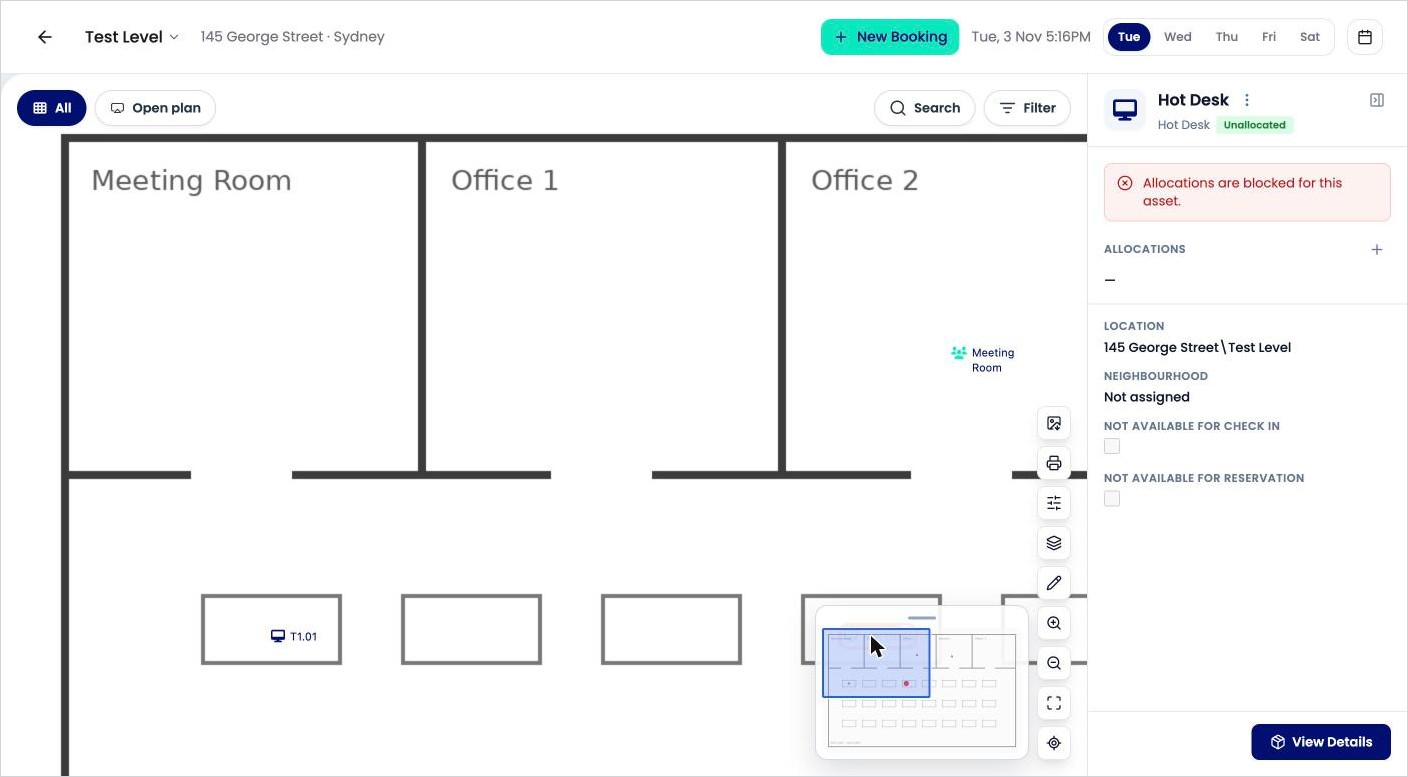
To stop only future bookings, or only check-ins, use Not Available For Reservation or Not Available For Check In instead. See How do I change the booking rules?
Edit an asset’s details
Leave edit mode and click the asset. Its panel shows who it’s allocated to, its location and neighbourhood, and its availability. Click View Details, then Edit, to change its name, code, capacity, neighbourhood, extra fields or calendar.
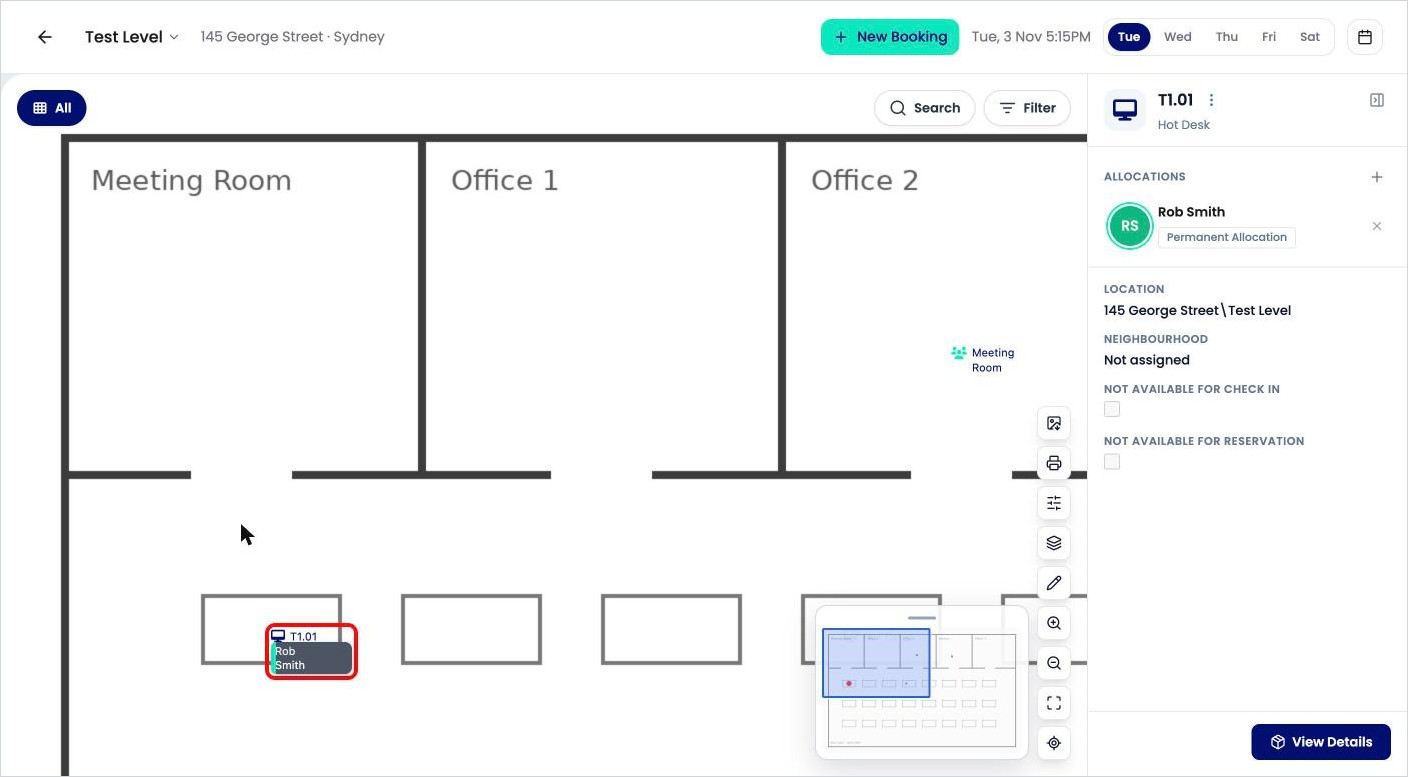
Tips
-
Zoom in with the + button before placing small items, so they land in the right spot.
-
Turn on the grid to line up rows of desks.
-
Made a mistake? Click Undo straight away.