
Want to control how far ahead people can book, or when unused bookings are cancelled? This article shows you how to set the check-in and booking rules for your organisation, and how to stop a single desk or room from being booked.
Note: Booking rules are a PRO feature. They apply to everyone in your organisation.
Open the booking rules
-
Click Admin, then Administration.
-
Under Settings, click Allocations.
The page has four sections: Temporary Allocations (check-ins), Reservations, Neighborhood Restrictions and Check In Questionnaire.
Check-ins (Temporary Allocations)
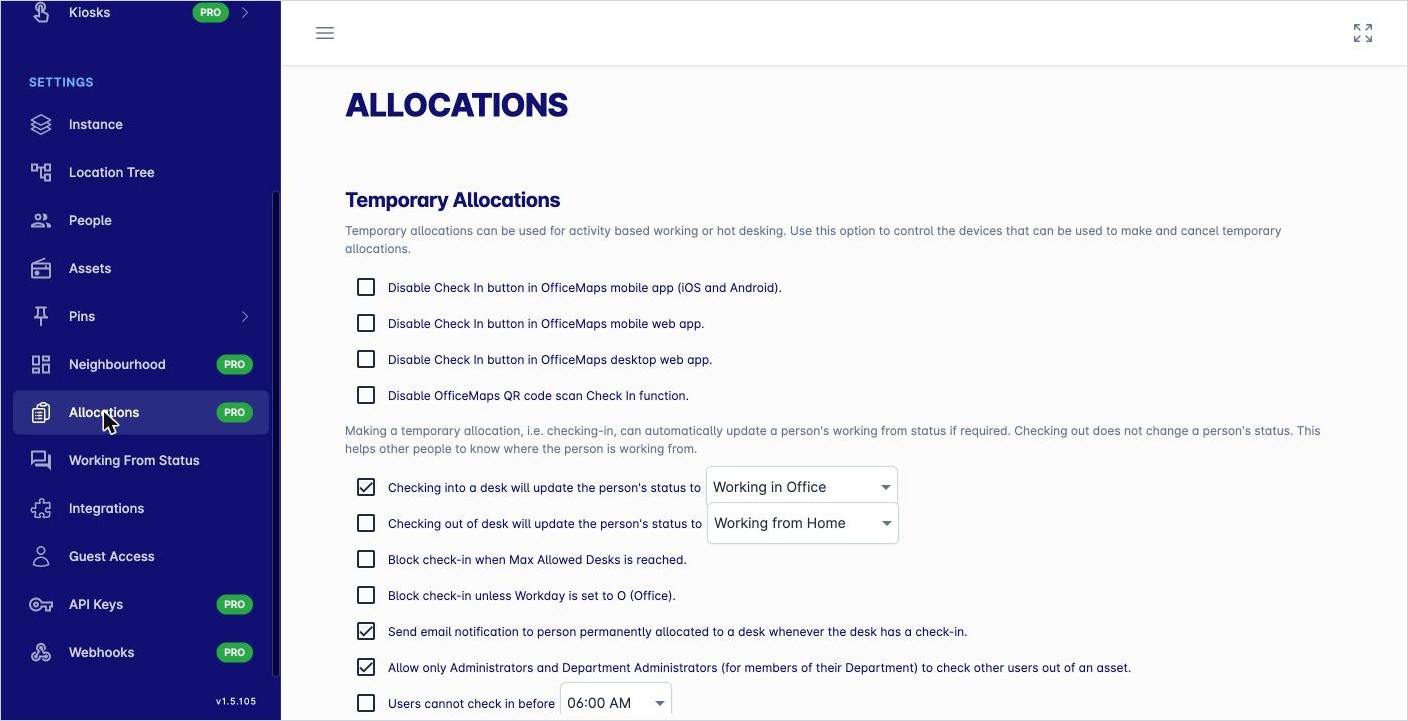
A check-in, or temporary allocation, is when someone takes a desk for the day.
|
Setting |
What it does |
|---|---|
|
Disable Check In button in the mobile app, mobile web app or desktop web app |
Stops people checking in from that app. |
|
Disable OfficeMaps QR code scan Check In function |
Stops people checking in by scanning a desk’s QR code. |
|
Checking into a desk will update the person’s status to… |
Changes the person’s status when they check in, for example to Working in Office. |
|
Checking out of desk will update the person’s status to… |
Changes the person’s status when they check out. |
|
Block check-in when Max Allowed Desks is reached |
Stops check-ins once the Max Allowed Desks limit is reached. |
|
Block check-in unless Workday is set to O (Office) |
Only lets people check in on days their workday plan says Office. |
|
Send email notification to person permanently allocated to a desk whenever the desk has a check-in |
Lets someone with a permanent desk know when another person checks in to it. |
|
Allow only Administrators and Department Administrators to check other users out |
Stops everyone else checking people out. Department administrators can check out members of their own department. |
|
Users cannot check in before… |
Sets the earliest time of day people can check in. |
Reservations
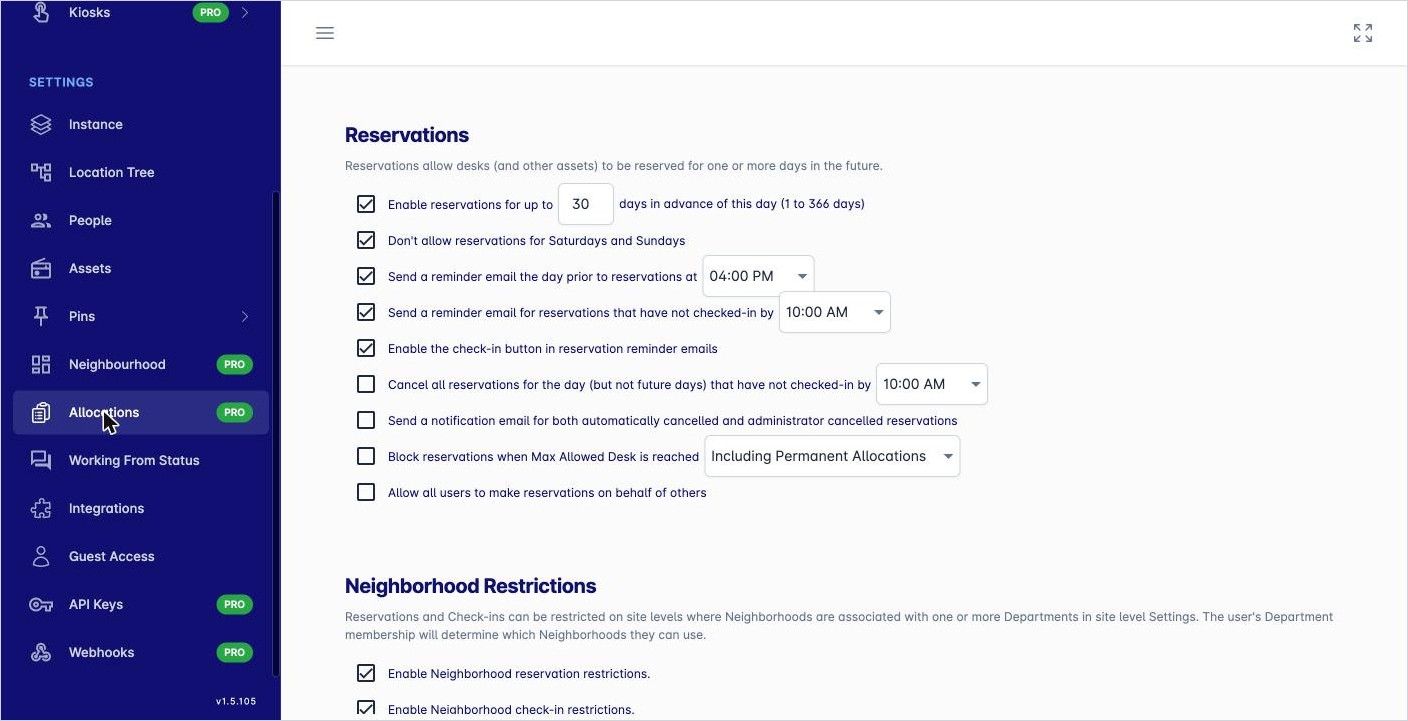
A reservation books a desk or other asset for a future day.
|
Setting |
What it does |
|---|---|
|
Enable reservations for up to … days in advance |
Turns reservations on and sets how far ahead people can book, from 1 to 366 days. |
|
Don’t allow reservations for Saturdays and Sundays |
Stops weekend bookings. |
|
Send a reminder email the day prior to reservations at… |
Emails people the day before their booking. |
|
Send a reminder email for reservations that have not checked-in by… |
Reminds people who haven’t checked in by the time you choose. |
|
Enable the check-in button in reservation reminder emails |
Lets people check in straight from the reminder email. |
|
Cancel all reservations for the day (but not future days) that have not checked-in by… |
Frees up desks that were booked but not used. |
|
Send a notification email for both automatically cancelled and administrator cancelled reservations |
Tells people when their booking is cancelled for them. |
|
Block reservations when Max Allowed Desk is reached |
Stops bookings once the Max Allowed Desks limit is reached. Choose whether to include permanent allocations in the count. |
|
Allow all users to make reservations on behalf of others |
Lets anyone book for a colleague, not just administrators. |
Neighbourhood restrictions
These options limit bookings and check-ins in a neighbourhood to the departments linked to it. See How do I keep desks for one team only?
Check-in questionnaire
You can ask people one to five yes-or-no questions every time they check in, for example a health check.
-
Tick Every check in requires a questionnaire to be completed with between 1 and 5 Yes or No questions.
-
Enter a Page Heading and your questions (Q1 to Q5).
-
For each question, choose whether check-in is allowed if the answer is Yes or No.
-
Enter the message to show when check-in isn’t allowed.
Stop one asset being reserved or checked in to
Sometimes you want to keep a specific desk or car park bookable on the day only, or not at all.
-
On the floorplan, click the asset, then View Details.
-
Click Edit.
-
Under Availability, tick:
-
Not Available For Reservation to stop people booking it ahead, while still letting them check in on the day, or
-
Not Available For Check In to stop check-ins as well.
-
-
Click Save.
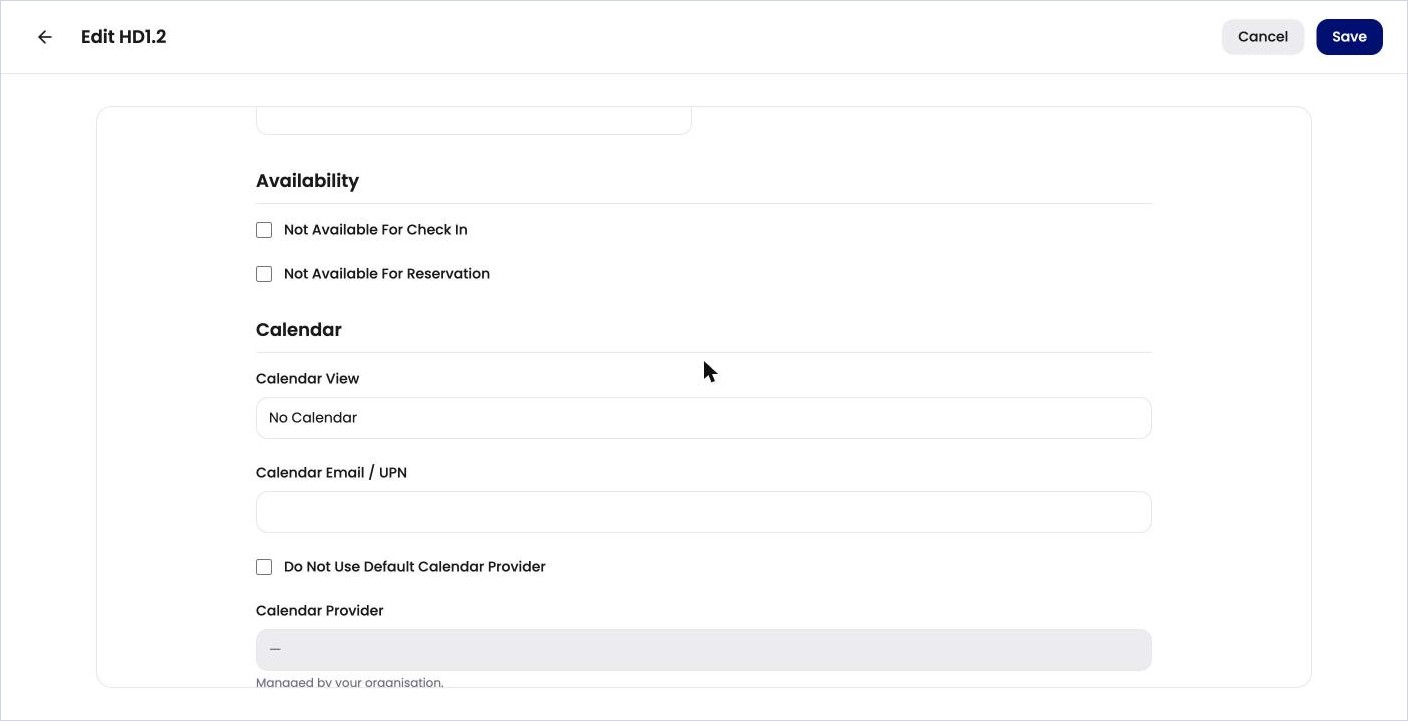
The Availability options for one asset.
Show a meeting room’s calendar
For meeting rooms and other resources that have their own calendar, such as a Microsoft 365 room mailbox, you can show that calendar in OfficeMaps.
-
Open the asset’s details and click Edit.
-
Under Calendar, set Calendar View to Free/Busy View, Detailed View Only or View/Add, and enter the resource’s Calendar Email / UPN.
-
If the resource uses a different calendar connection, tick Do Not Use Default Calendar Provider and choose the Calendar Provider.
-
Click Save.
Tips
-
Turn on the cancel-by time together with the reminder email, so people get a chance to check in before their booking is released.
-
Asset types also control booking. A type must have Can Check In and Can Reserve ticked for its assets to be booked. See How do I create or change an asset type?