
Want to change the statuses people can choose, like Working in Office or On Vacation? This article shows you how to add, change and delete statuses, set the default, and decide whether people confirm their status each day.
How statuses work
Every status belongs to one of three workdays: Office, Remote or Non-workday. When someone picks a status, they’re also saying whether they’re in the office, working remotely or not working that day.
People set their own status from their profile picture. See How do I set my status and workday plan?
Open status settings
-
Click Admin, then Administration.
-
Under Settings, click Working From Status.
Default status and daily confirmation
|
Setting |
What it does |
|---|---|
|
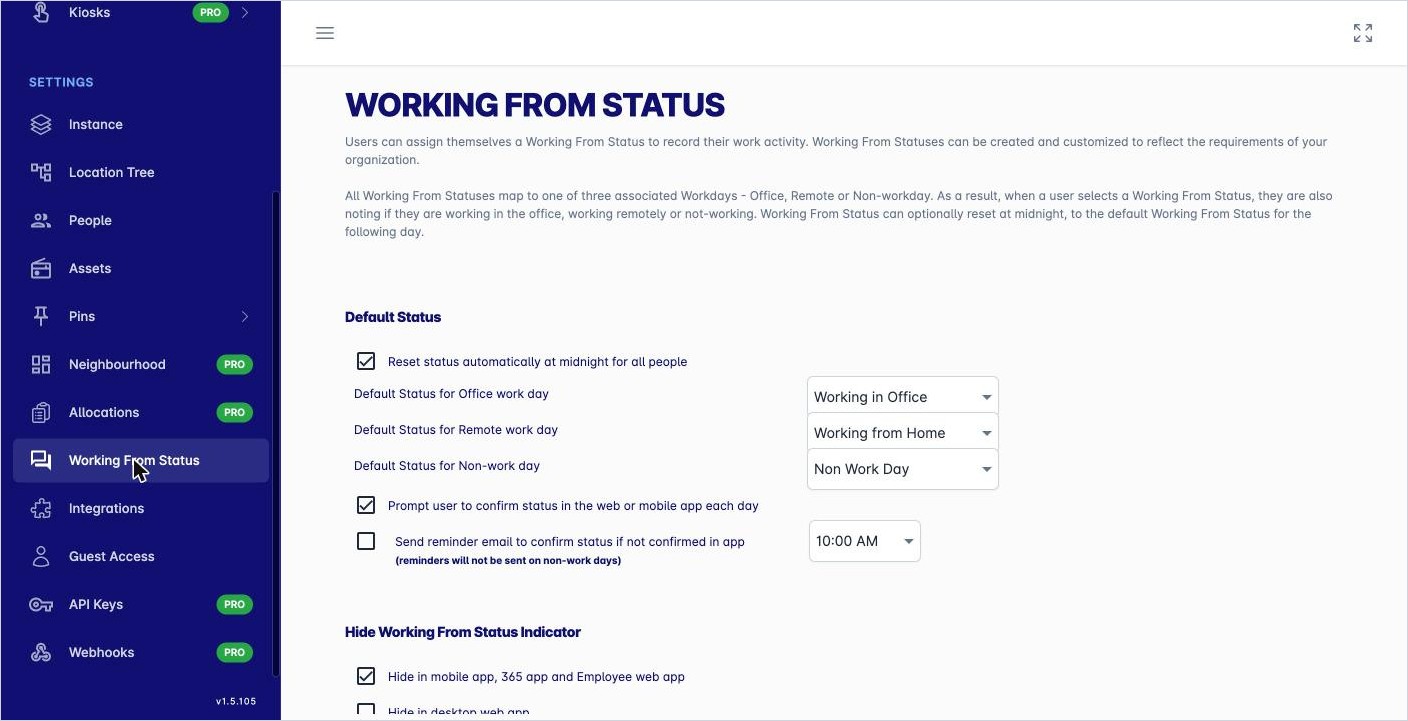
Reset status automatically at midnight for all people |
Each night, everyone’s status goes back to the default for the next day, based on their workday plan. |
|
Default Status for Office work day |
The status people get on a day their workday plan says Office. |
|
Default Status for Remote work day |
The status people get on a Remote day. |
|
Default Status for Non-work day |
The status people get on a Non-workday. |
|
Prompt user to confirm status in the web or mobile app each day |
Shows people their status with Confirm and Change buttons, so they can check it each day. |
|
Send reminder email to confirm status if not confirmed in app |
Emails people who haven’t confirmed by the time you choose. No reminders are sent on non-work days. |
To stop a person getting the daily prompt and email, tick Exclude from status confirmation notifications on their record. See How do I add or remove a person?
Hide the status indicator
Under Hide Working From Status Indicator, you can hide status:
-
in the mobile app, the 365 app and the Employee web app, or
-
in the desktop web app.
The list of statuses
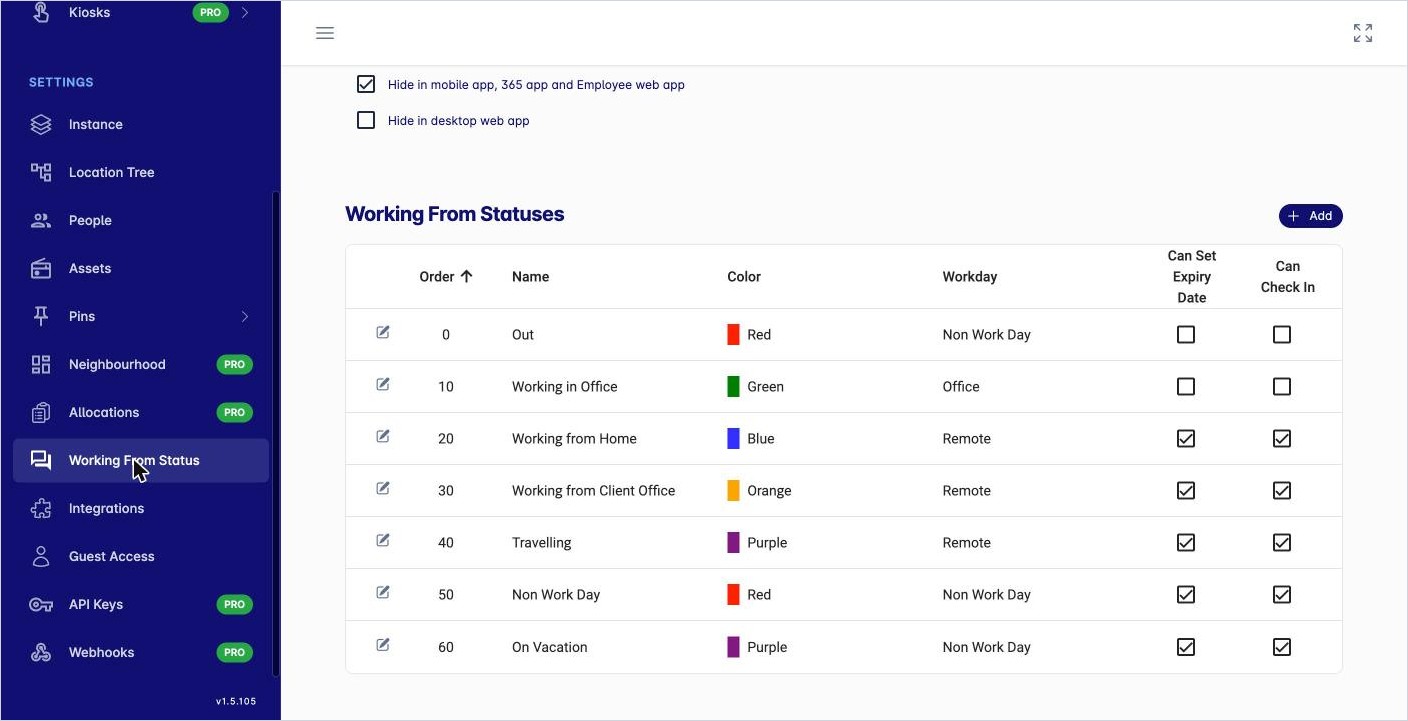
The Working From Statuses list shows each status with its order, colour, workday, and two options:
-
Can Set Expiry Date: people can set an end date, for example for a holiday.
-
Can Check In: people with this status can check in to a desk.
Add a status
-
Click + Add. The New Status panel opens.
-
Fill in Working From Status (the name), Workday, Order and Colour.
-
Tick Can Set Expiry Date and Can Check In if you need them.
-
Click the save icon (the disk).
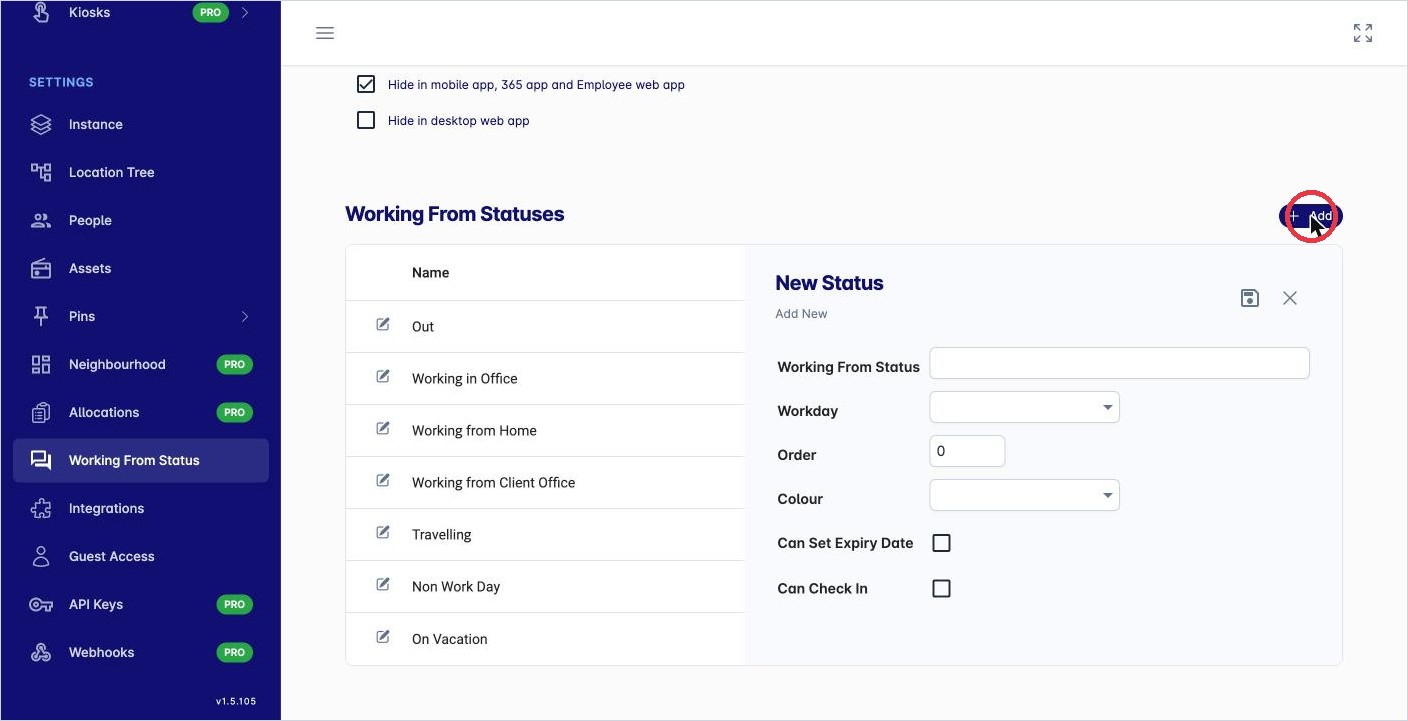
The New Status panel.
Change or delete a status
Click the pencil next to the status. Its settings open in a panel on the right. To delete it, click the bin icon at the top of the panel.
Tips
-
Keep the list short, so people can find the right status quickly.
-
Use colours that are easy to tell apart, like the green used for Working in Office.