Need to add a new starter, update someone's details or remove someone who has left? This article shows you how to add, edit and remove people one at a time, and how to change several people at once.
Note: To add or update many people at once, use Excel or sync from Microsoft Entra. See How do I import people from Excel? and How do I sync people from Microsoft Entra (Azure AD)?
Open the People list
-
Click Admin, then Administration.
-
Under Administration, click People, then People.
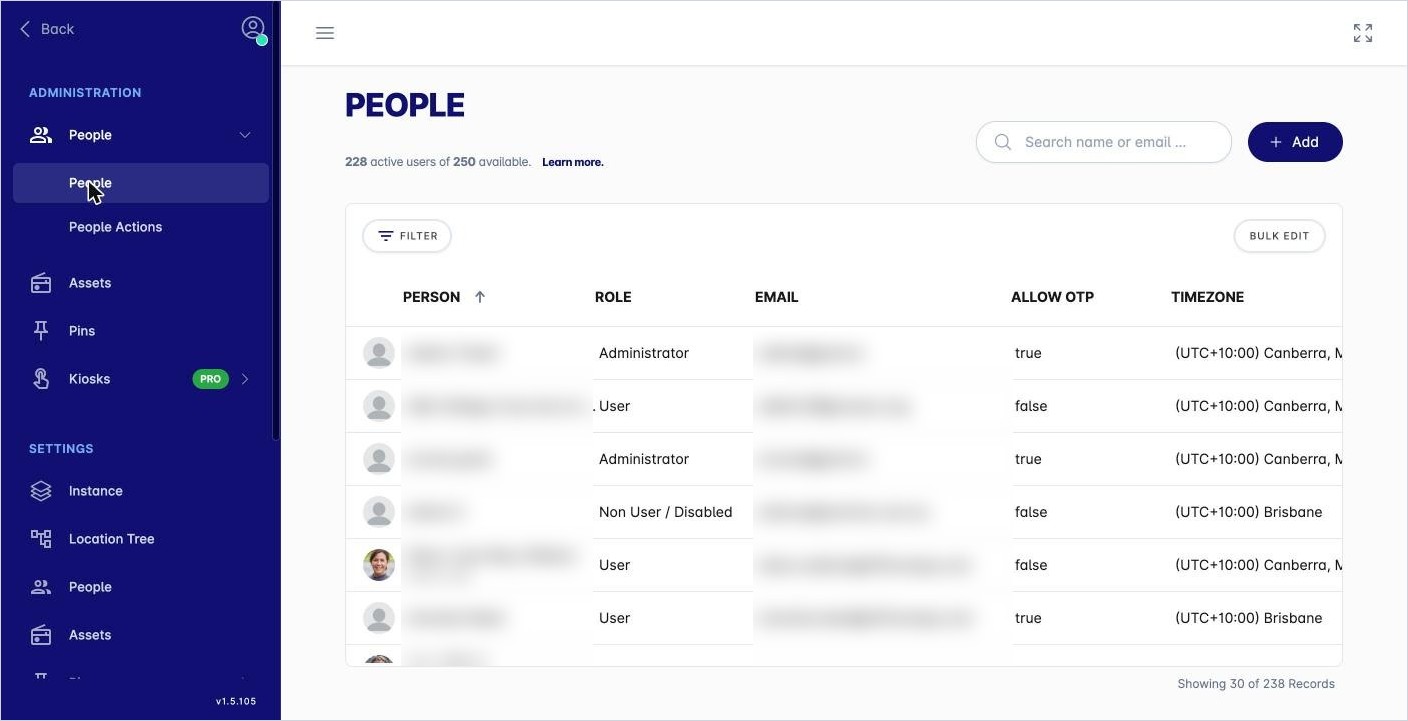
The list shows each person’s role, email, whether they can use a one-time password, and their time zone. The top of the page shows how many active users you have and how many your plan allows.
-
Use Search name or email… to find someone.
-
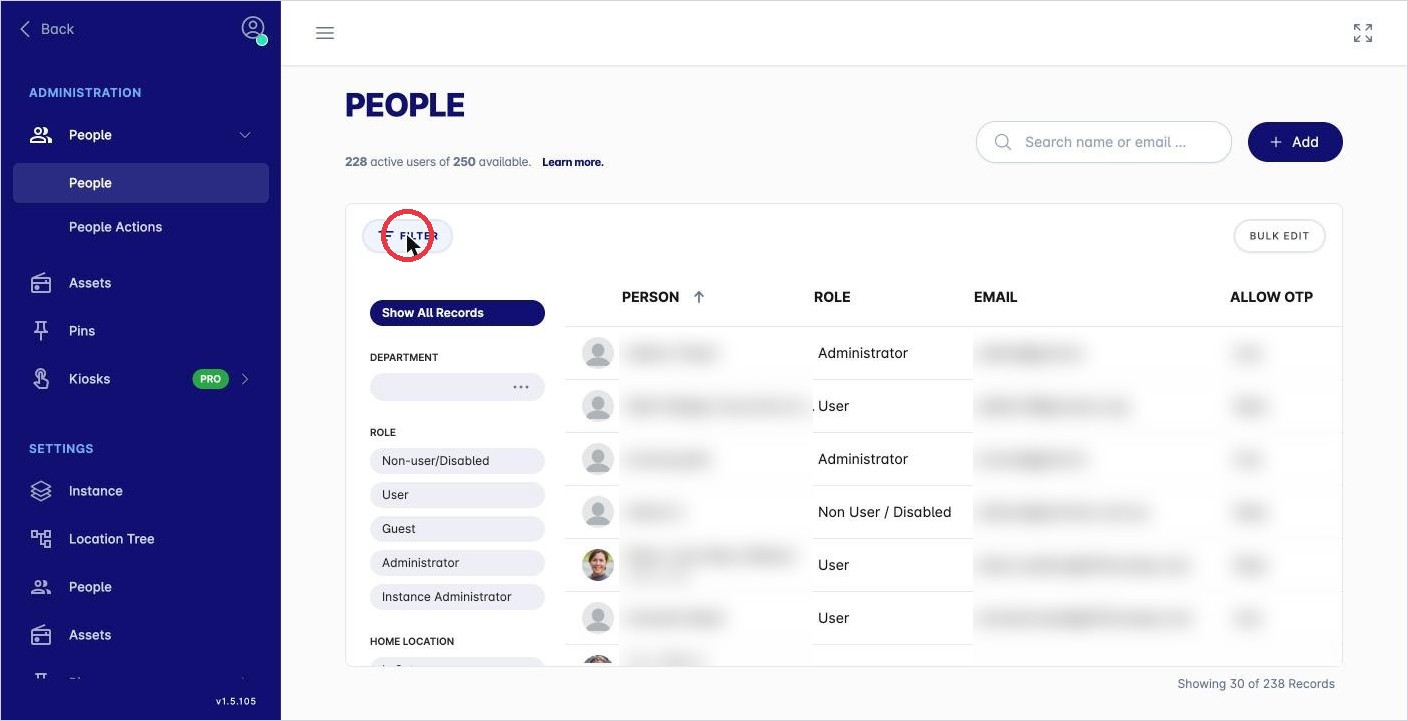
Click Filter to narrow the list by department, role or home location.
Add a person
-
Click + Add. The New Person panel opens on the right.
-
Fill in the details:
-
Basic Information: First Name, Last Name, Display Name (required), Username, Email and Role. See How do I make someone an admin?
-
Contact Information: Employee ID, Phone, Phone Extension, Position and Badge Number.
-
Launch Location: the location OfficeMaps opens at for this person.
-
Location: Home Location and Time Zone.
-
Settings: Calendar View, Launch Mode, Allow OTP, Is Provider User, Don’t send Welcome Email, Exclude from status confirmation notifications and Is Hidden From Users.
-
-
Click Save. To leave without adding the person, click Cancel.
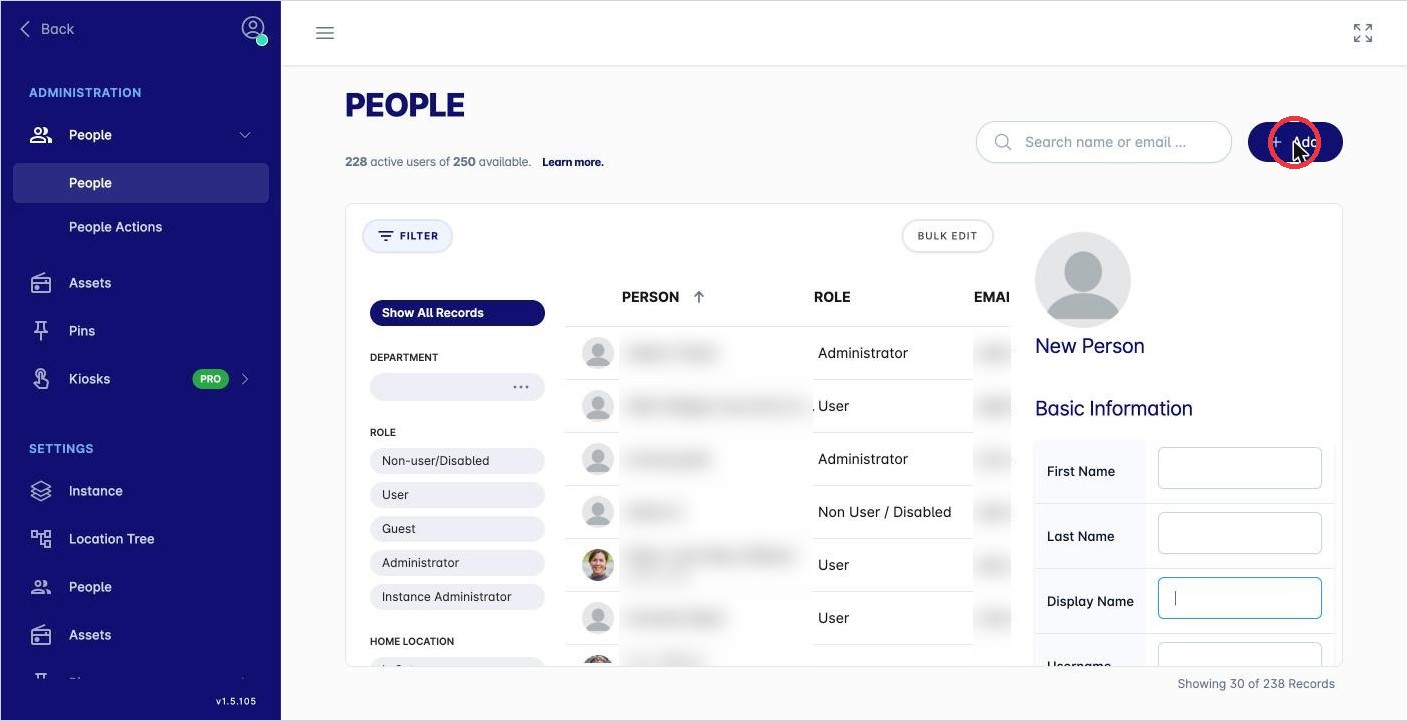
Click + Add to open the New Person panel. 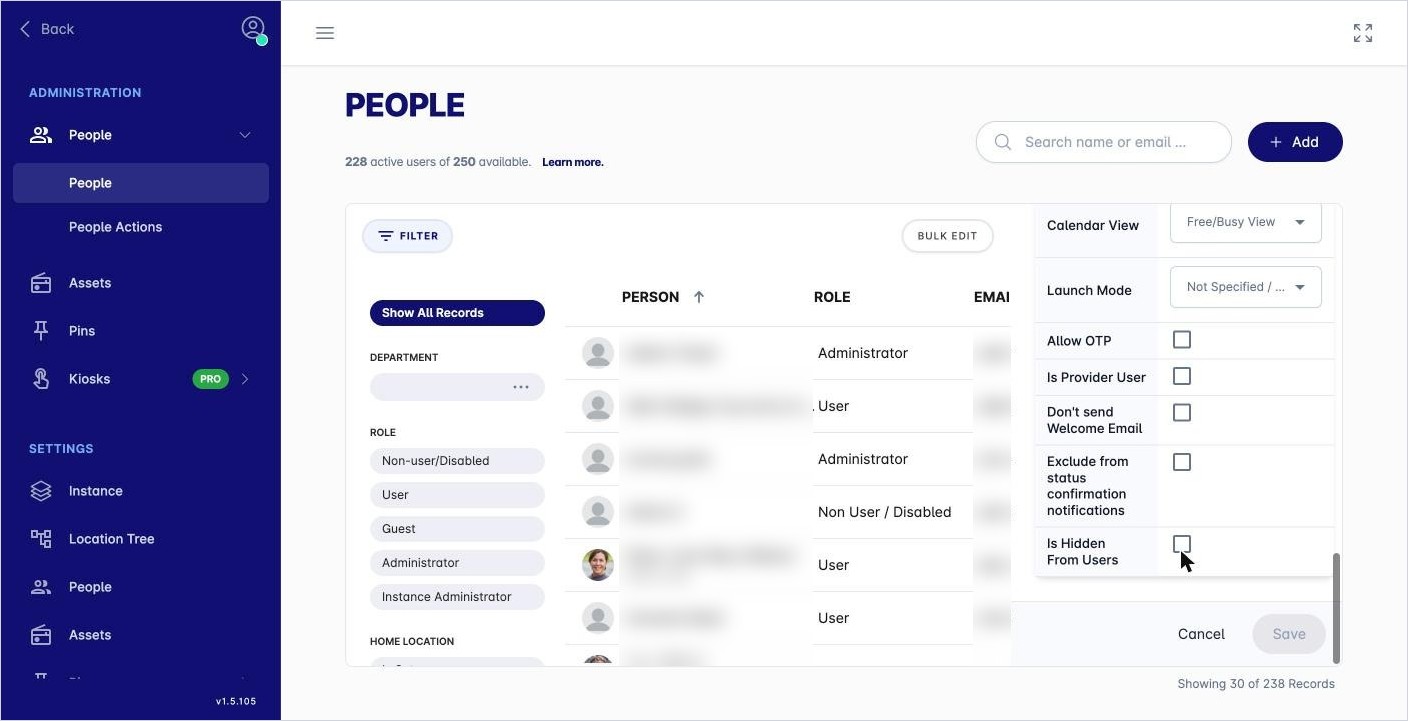
The Settings section at the bottom of the panel.
|
Setting |
What it does |
|---|---|
|
Calendar View |
How much of the person’s calendar others can see: no calendar, free/busy, or detailed. |
|
Launch Mode |
Leave as Not Specified / Default for everyday users. Booking Kiosk is for kiosk accounts. |
|
Allow OTP |
Lets the person log in with a one-time password, even if your organisation requires Google or Microsoft log in. See How do I change how people log in? |
|
Don’t send Welcome Email |
Stops OfficeMaps emailing the person when you add them. |
|
Exclude from status confirmation notifications |
Stops the daily prompt and email asking the person to confirm their status. |
|
Is Hidden From Users |
Hides the person from everyone except administrators. |
Adding contractors and visitors
Add them like anyone else. Some tips:
-
Make it clear they’re external in the display name, for example (External) Sam Lee.
-
If they won’t log in themselves (for example, you’ll book desks for them), tick Don’t send Welcome Email.
Set a person’s launch location
In V2, people can’t choose their own launch location. An administrator sets it:
-
When you add someone: set Launch Location in the New Person panel.
-
For people already in OfficeMaps: use bulk edit (below) and choose Change Launch Location or Clear Launch Location. This works for one person or many.
Edit a person
You can edit someone from their profile:
-
Find them with Search for… at the top of the page, or under Explore › People.
-
On their profile, click Edit.
-
Change the details, then click Save.
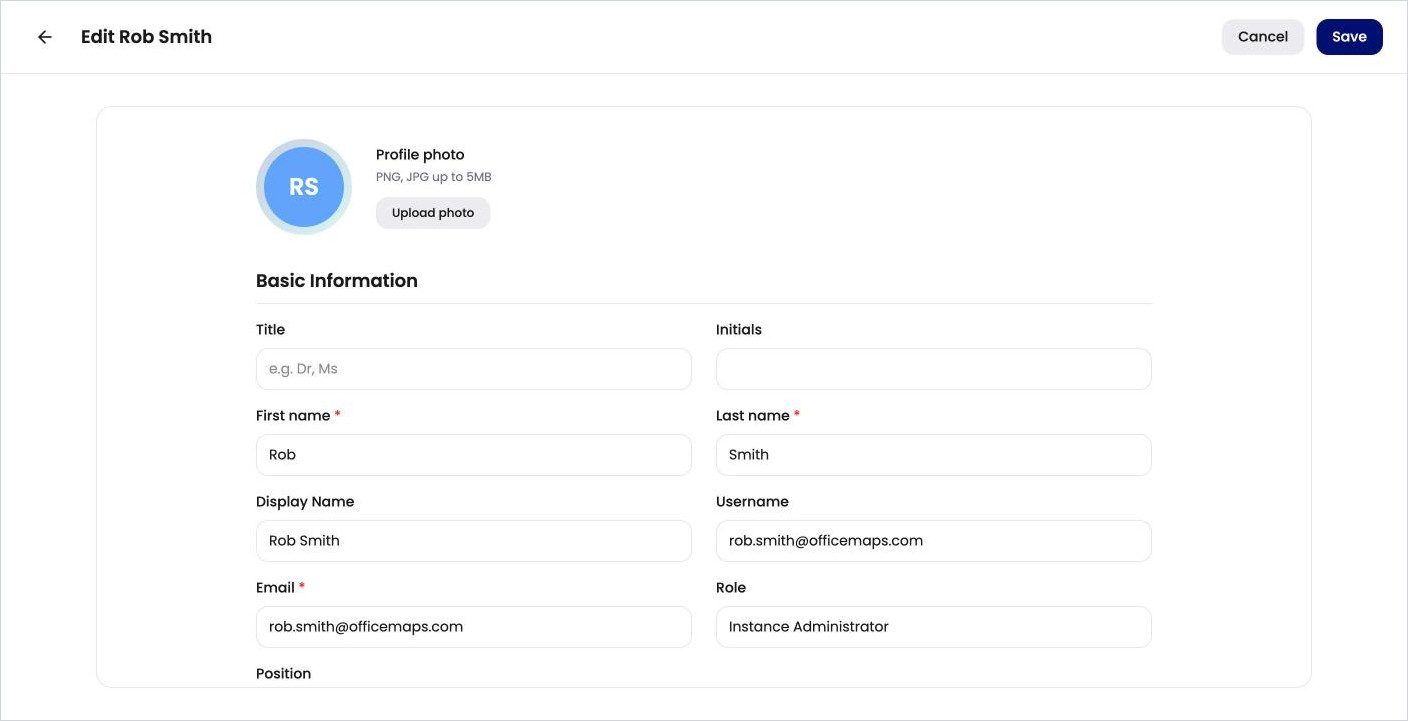
Editing a person from their profile.
On this page you can also upload a profile photo (PNG or JPG, up to 5 MB), set their departments, who they report to, their status and their home location.
Change several people at once
-
In the People list, click Bulk Edit.
-
Click ⊕ next to each person you want to change. They’re added to Selected People.
-
Choose an action from Select a bulk operation, then click Apply.
-
Click Yes to confirm.
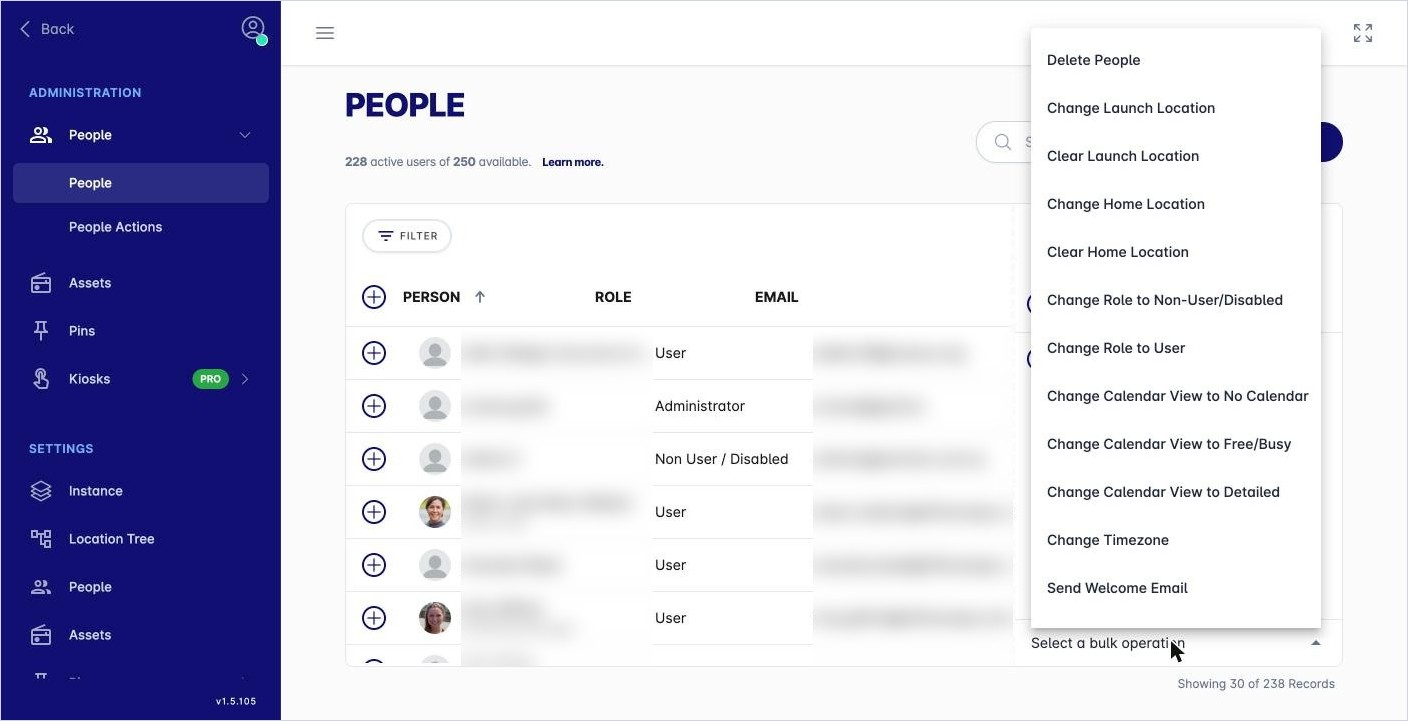
Bulk operations for the selected people. 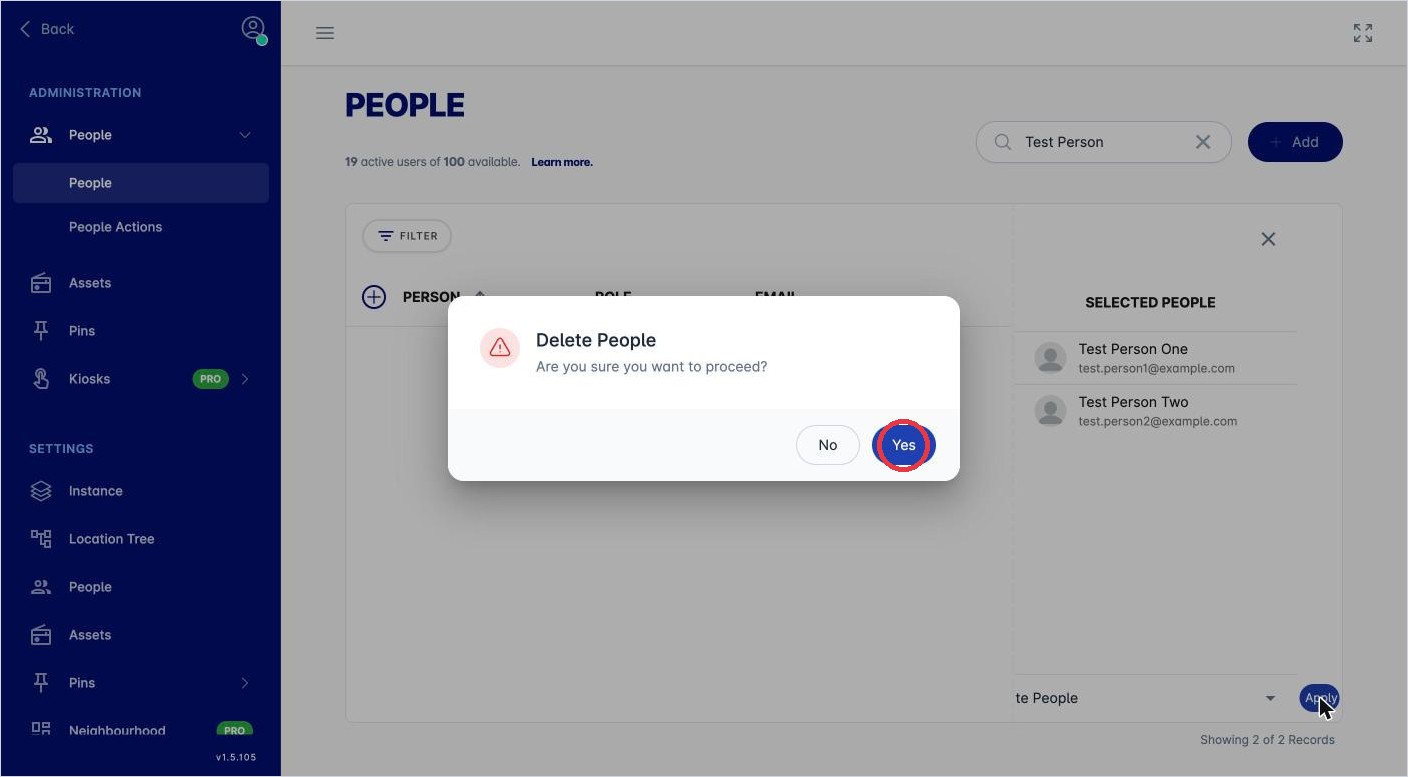
Confirm the bulk operation.
The bulk operations are: Delete People, Change or Clear Launch Location, Change or Clear Home Location, Change Role to Non-User/Disabled, Change Role to User, Change Calendar View (No Calendar, Free/Busy or Detailed), Change Timezone and Send Welcome Email.
Remove someone
There are two ways, depending on whether you want to keep their record.
-
They’ve left for good: use bulk edit, select them, choose Delete People and click Apply, then Yes. This permanently deletes them.
-
They might come back, or you want to keep their history: change their Role to Non User/Disabled. They can’t log in, but their details are kept.
Warning: Delete People is permanent. Check the Selected People list carefully before you click Apply. If you’re not sure, change the person’s role to Non User/Disabled instead.
Export the list
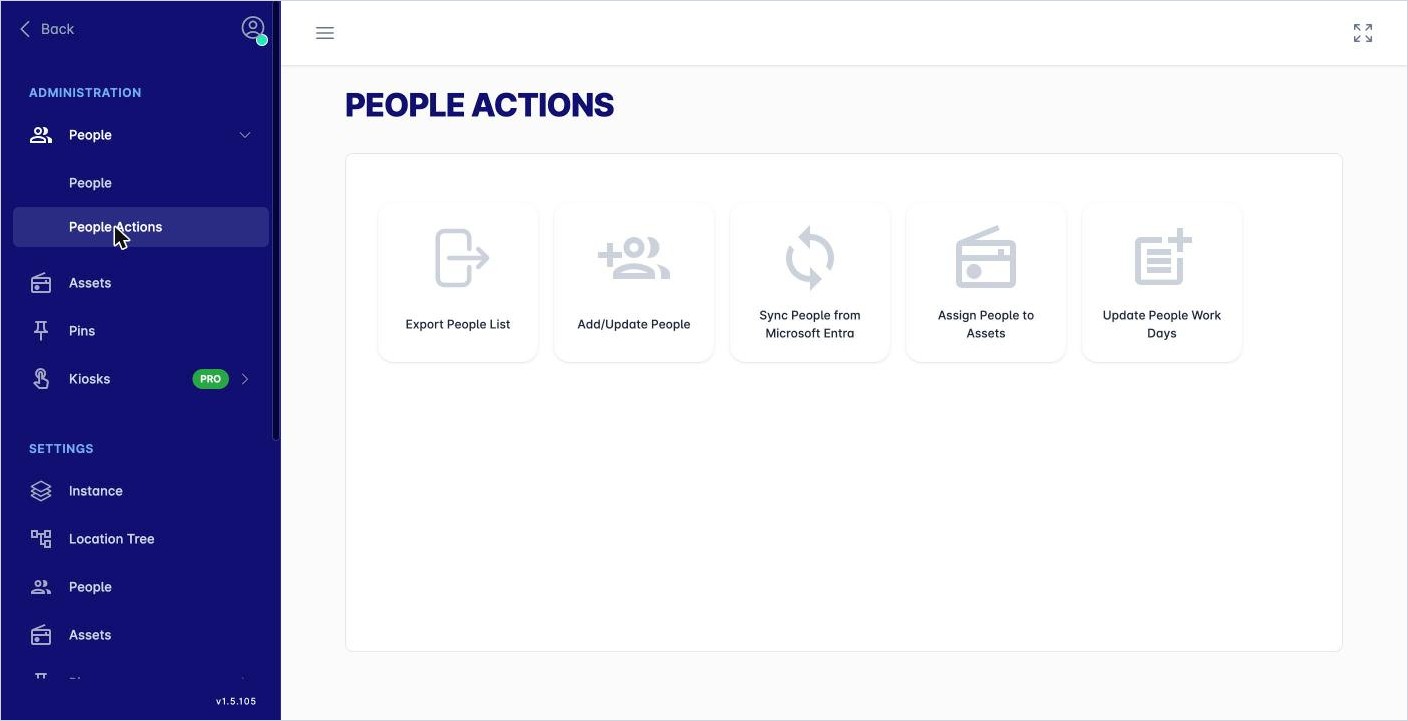
To download everyone as a spreadsheet, go to People › People Actions and click Export People List.