
Need a desk but already in Teams? This article shows you how to book one, check in and manage your bookings in the OfficeMaps 365 app.
Book a desk
-
Click New Bookings.
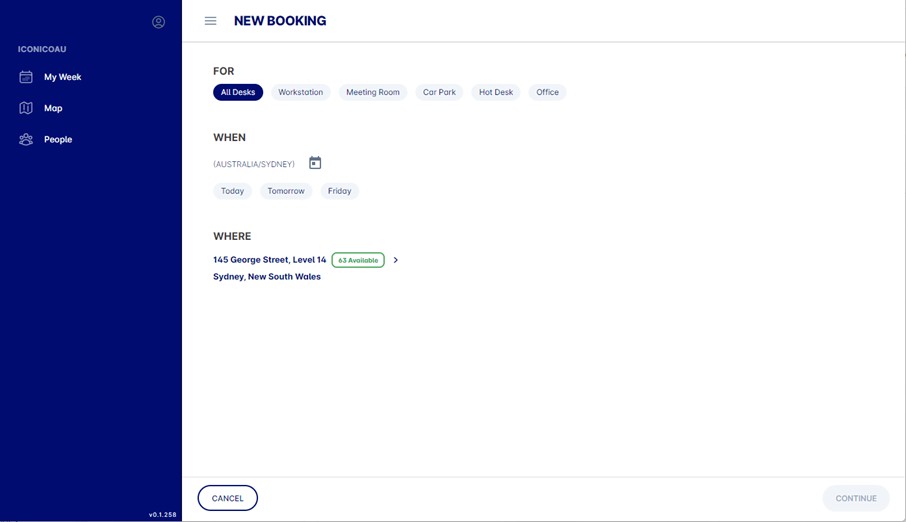
Click New Bookings. -
Choose what you want to book from the types at the top. All Desks shows every kind of desk.
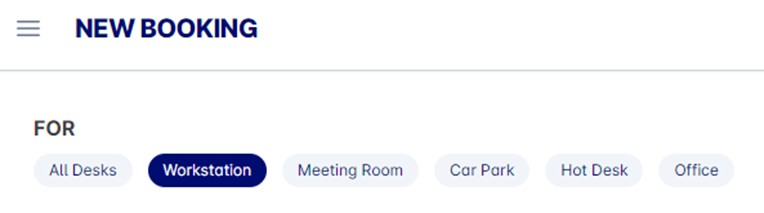
Choose what to book. -
Choose the day. Click Today, Tomorrow or the next day, or pick a start and end date in the calendar.
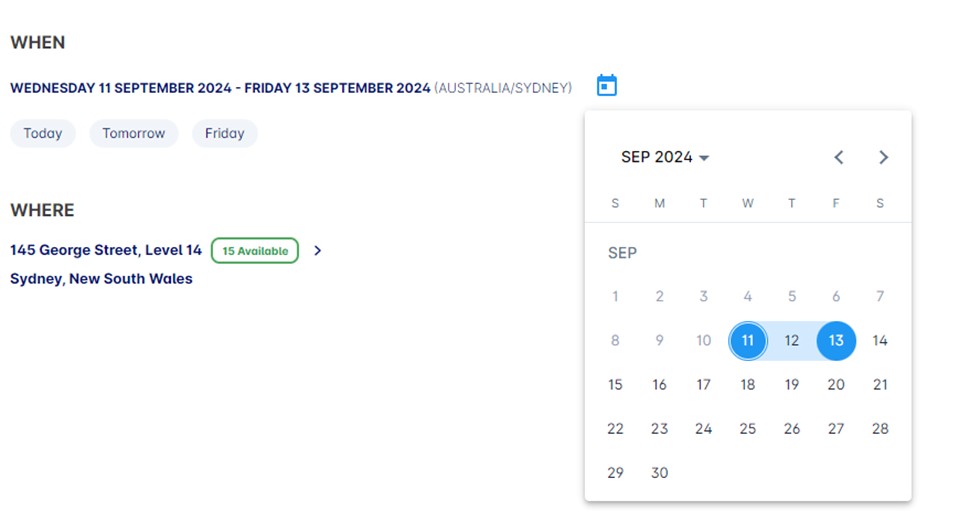
Choose the day. -
Under Where, choose a location. Each one shows how many are free.
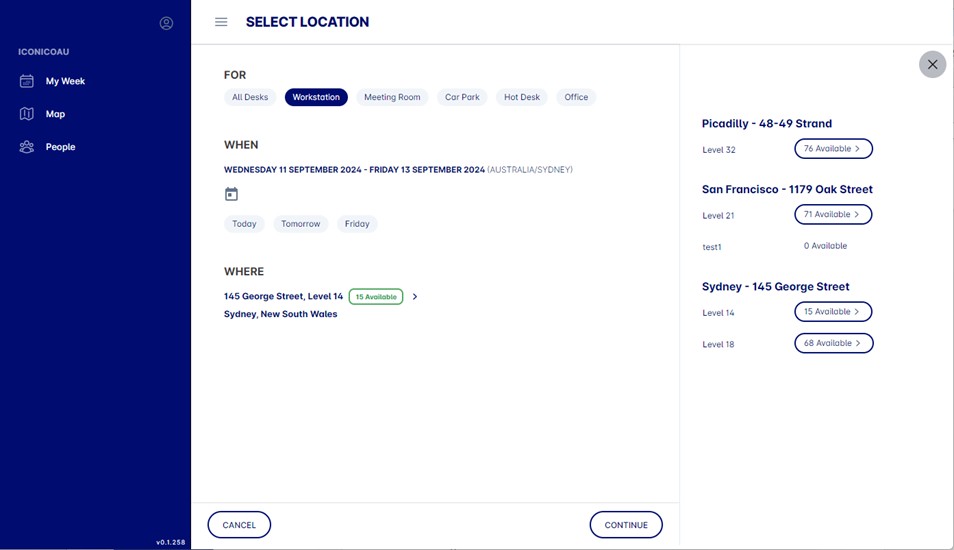
Choose a location. -
Filter by availability, neighbourhood or feature if you like, then choose a free desk.
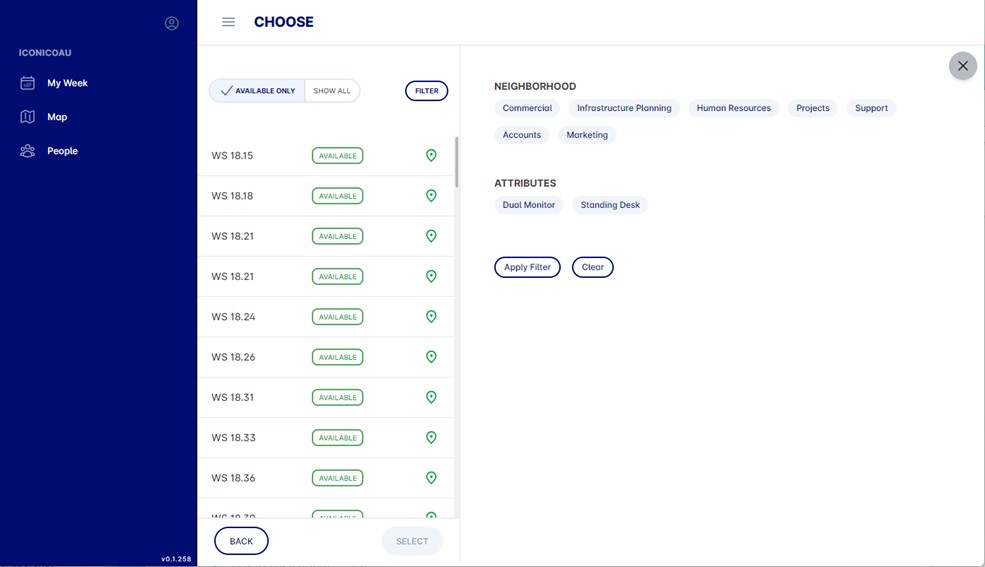
Choose a free desk. -
If the booking is for today, check in now, or later from My Week.
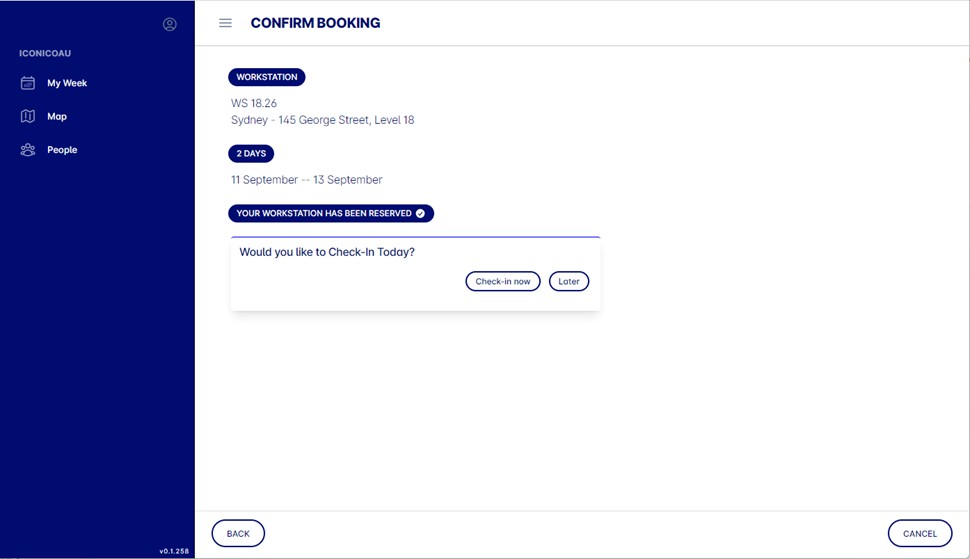
Check in now or later.
Check in, check out or cancel
On My Week, click a booking to see the desk and where it is on the map.
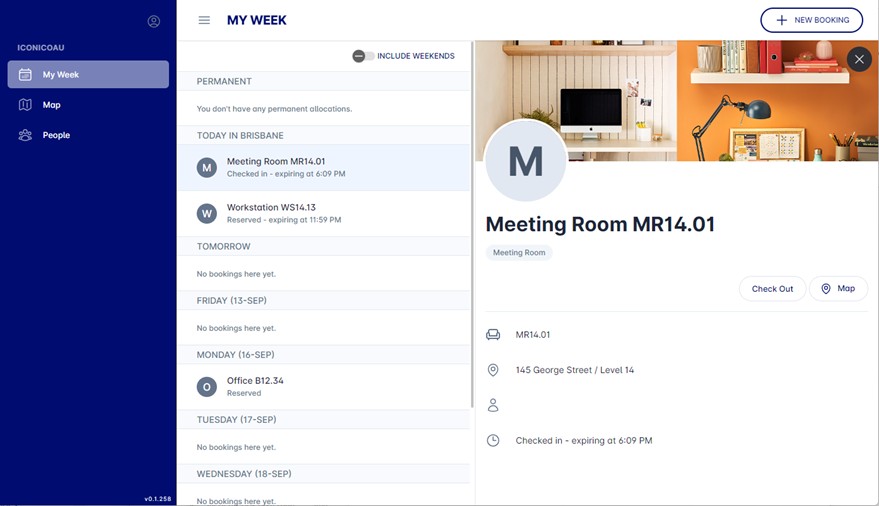
Booking details.
-
Cancel a booking you haven’t checked in to.
-
Check in to today’s booking and choose how long you need it.
-
Check out when you’re done.
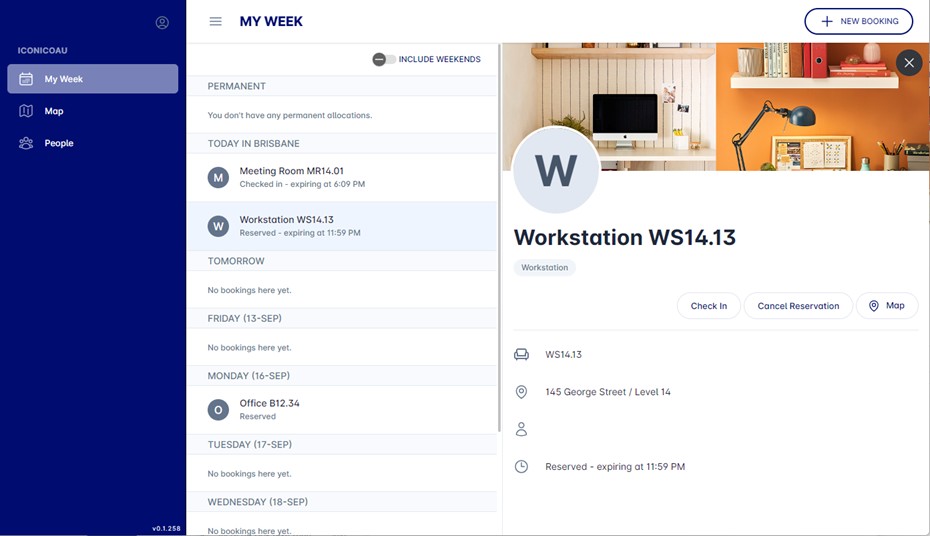
Cancel a booking.
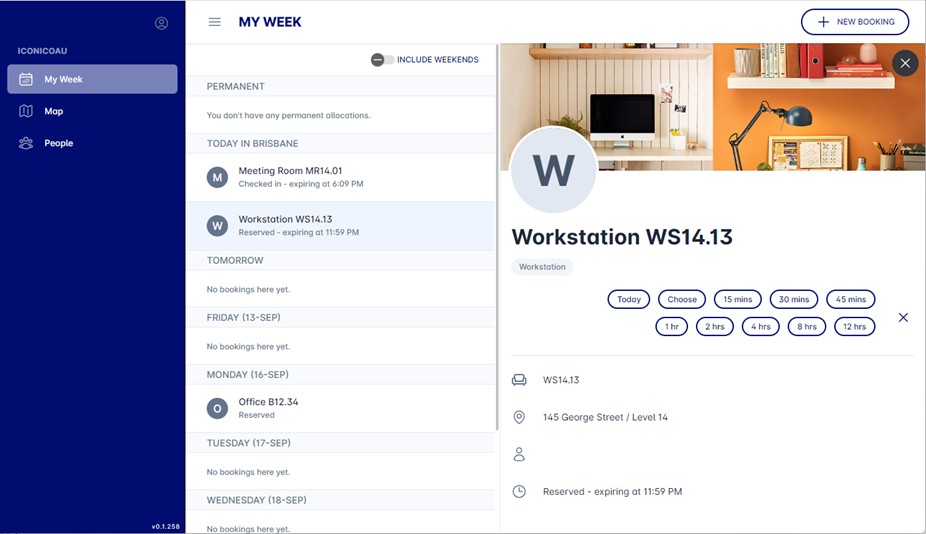
Check in and choose how long.
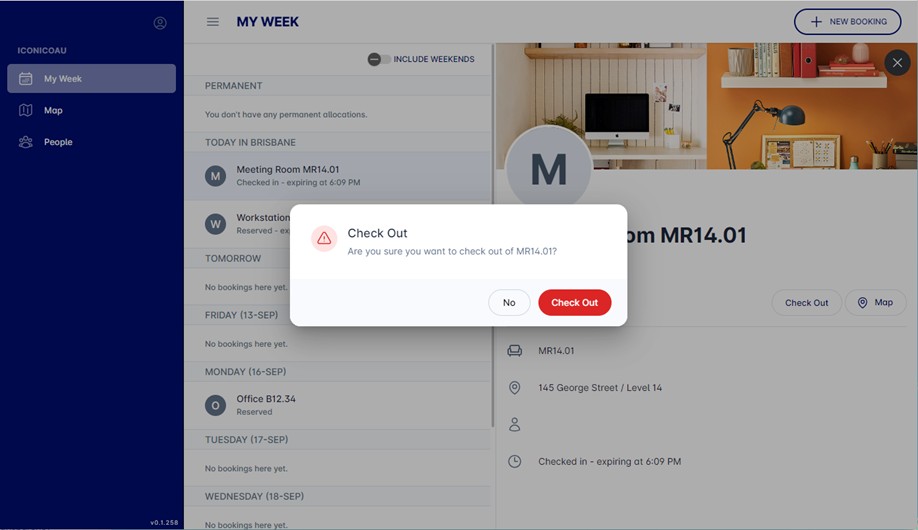
Check out.
Find floorplans and people
-
Maps shows every location. Choose a level to see its floorplan.
-
People lists everyone. Search by name or click a letter, then click someone to see their status, desk and contact details.
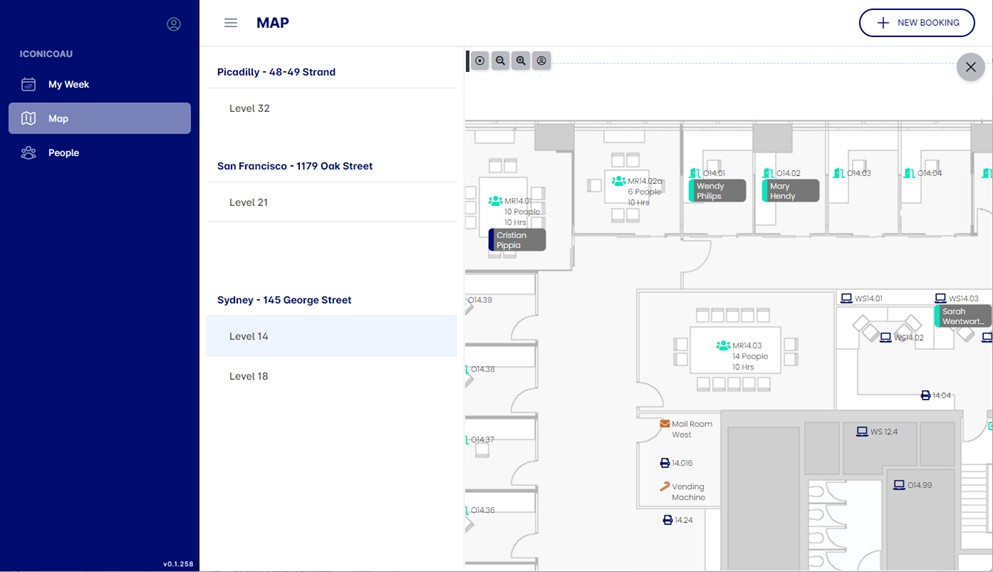
Maps.
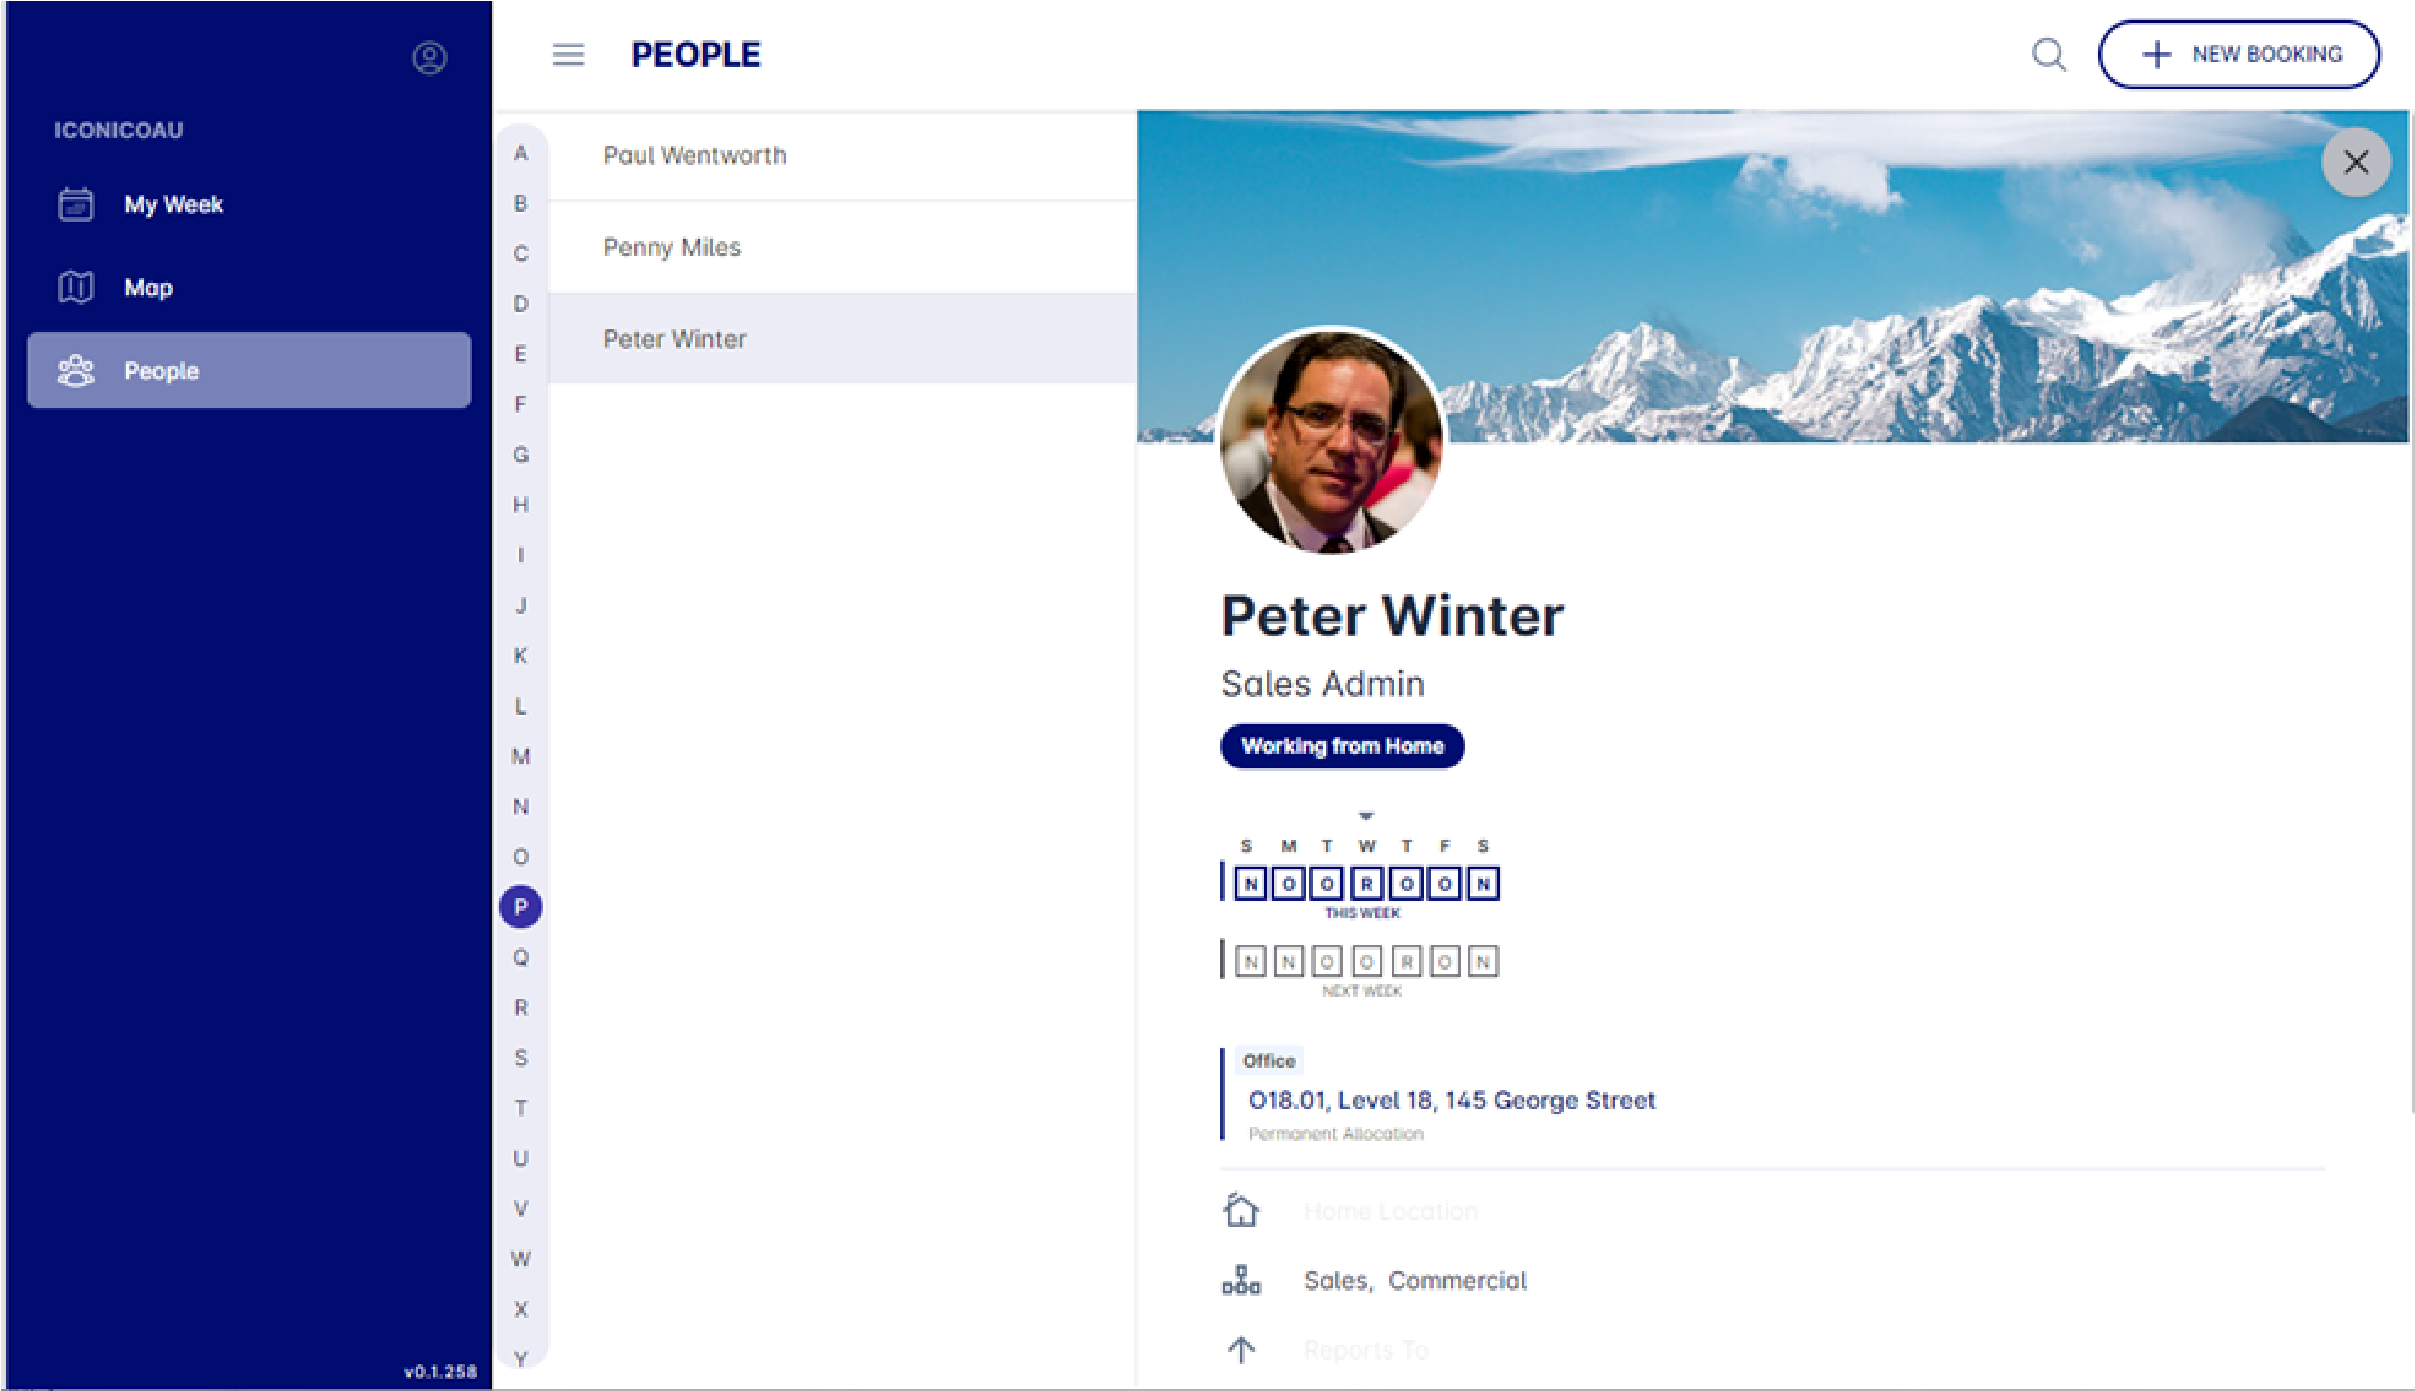
People.