
Want people to see a floor zoomed in on the hot desks, or showing only meeting rooms, with one click? This article shows you how to save a floorplan view, use it, and change or delete it.
Note: Views are saved per floor. Everyone who opens the floor sees its views as buttons at the top left, next to All.
Create a view
-
Open the level’s floorplan.
-
Set up the map the way you want it: zoom and move to the area, and choose your layers and filters.
-
Click Views (the stacked layers icon) in the toolbar on the right.
-
Click + Add new View.
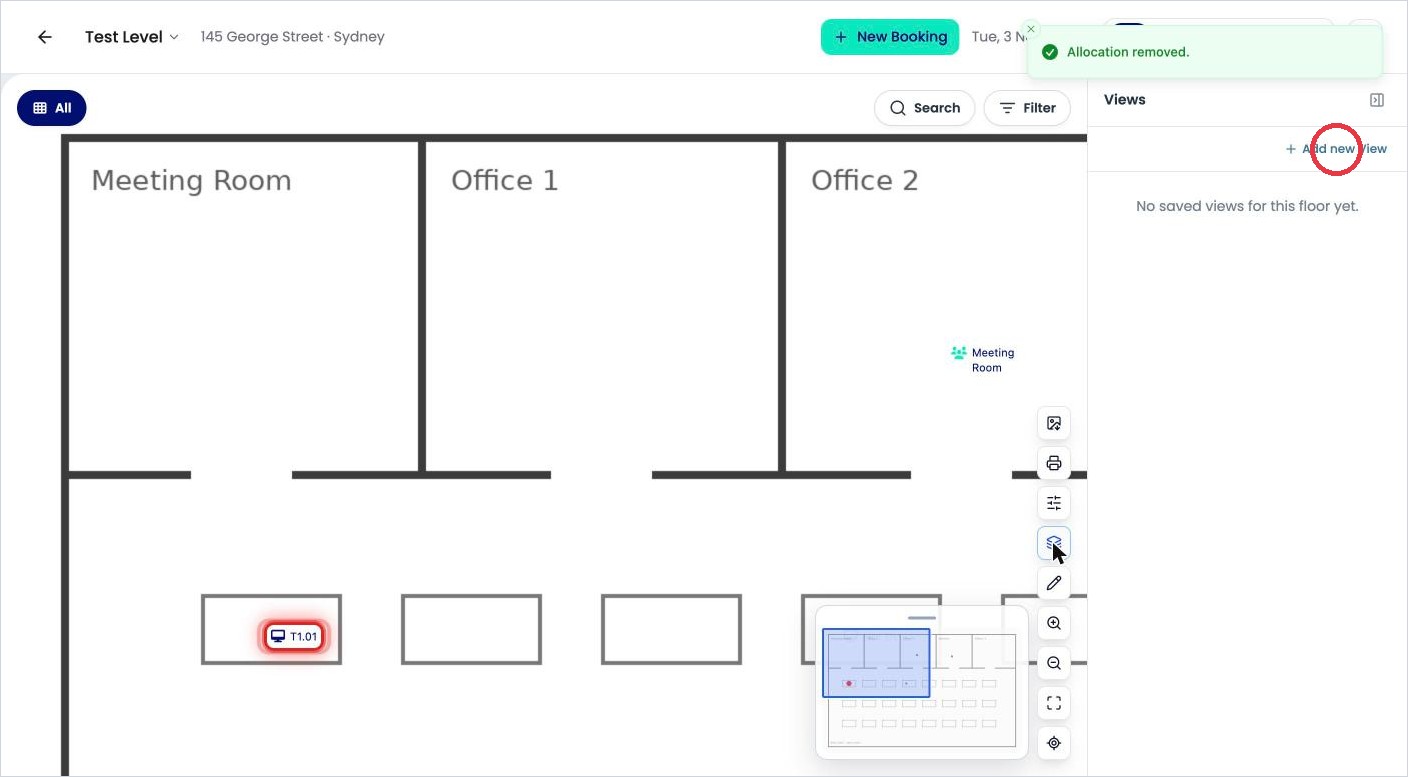
Click Add new View. -
Enter a View name, for example Open plan.
-
Choose an Icon and its colour. Use Search icons… to find one.
-
To open the floor in this view every time, tick Set as this floor’s default View.
-
Click Save View.
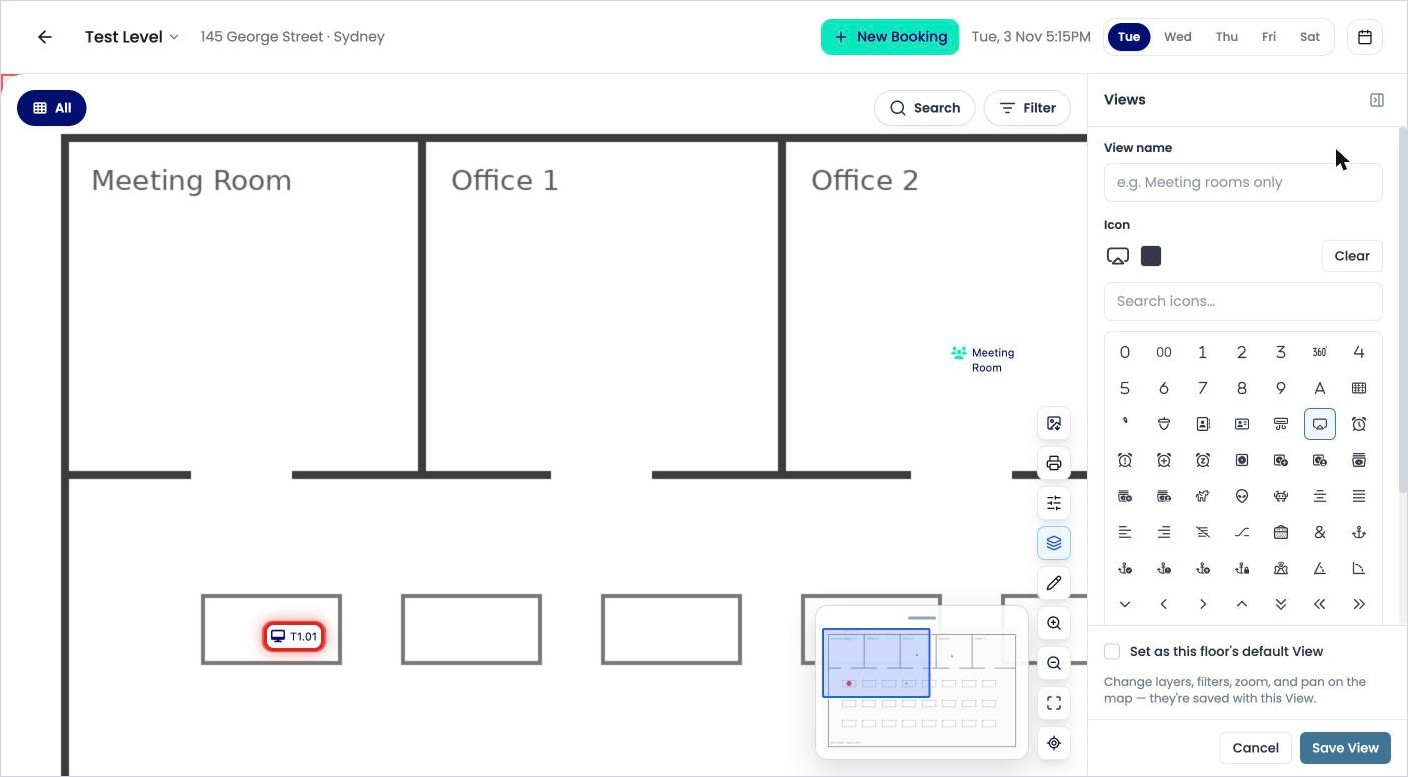
Name the view and pick an icon.
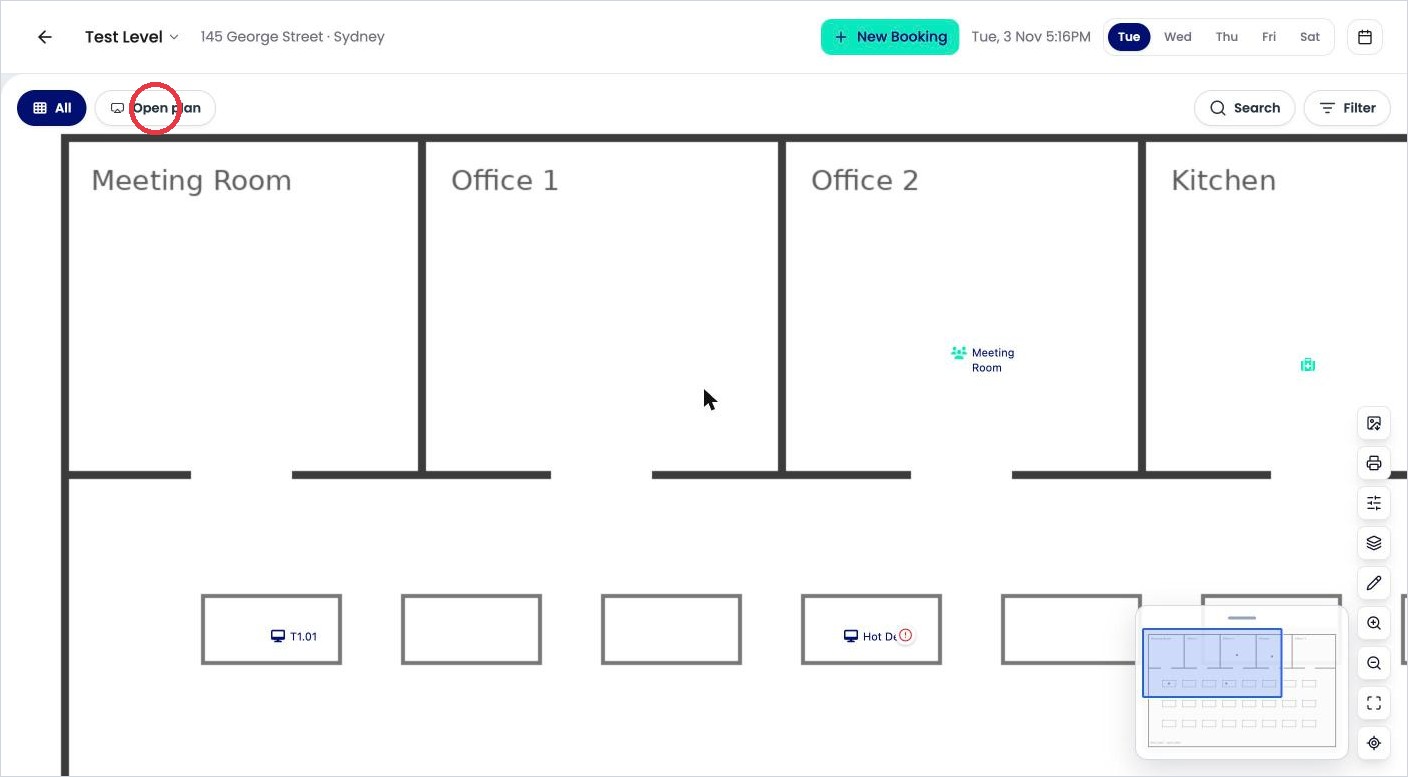
The view appears as a button at the top left of the floorplan.
Use a view
Click the view’s button at the top left of the floorplan. Click All to go back to the full floor.
Change or delete a view
-
Click Views in the toolbar.
-
Hover over the view, then:
-
click the pencil to change it. Adjust the map and the details, then click Save changes
-
click the bin to delete it.
-
Tips
-
Keep view names short, so the buttons fit across the top of the map.
-
Make the view people use most the floor’s default.